The San Diego County Library held a zine workshop during our library's art festival, where each participant created a page related to the loose theme of "Art."
The library provided all the materials on a large table, including pre-cut paper, markers, colored pencils, stamps, weeded illustrated books and magazines for collaging, glue and scissors. After the program, all the pages were compiled and formatted into a DIY magazine (a.k.a. "zine"). Finally, the zine was cataloged and entered into the library's collection as a reference item so the contributors could admire their work.
This program has gone through several iterations and can be adapted to any age group or interest.
Advanced Planning
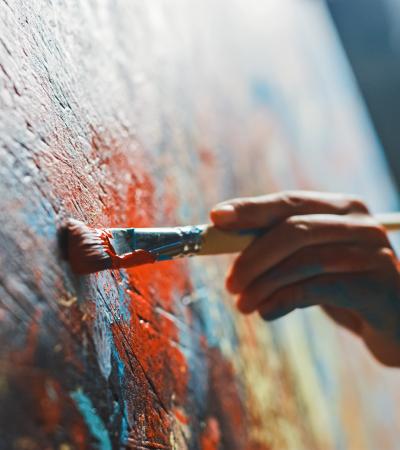
Zine programs appeal to librarians for myriad reasons. They are low-cost and low-prep, use upcycled materials and existing library resources, and promote creativity, literacy and freedom of expression.
The first step to planning a library zine workshop is deciding on your demographic. Zines are currently enjoying huge popularity in the young adult and millennial age groups; their spirit and aesthetic also appeals to teens and tweens.
Now is also the time to consider whether or not you want to explore a theme. Some patrons may be overwhelmed by the possibilities of zine subjects. To assist with this issue for a one-time zine workshop, you may decide on a theme in advance. From there, you may have each person in the program contribute one page to the final work, or each person can create their own zine. You may go as far as creating page templates for a more unified look, or pull examples of zine pages to provide inspiration.
Finally, you will market the program using the techniques that work best for your library. There is a bit of a learning curve when talking about and promoting zines, so be prepared to explain what they are, how they are pronounced (ZEEN, not ZIYNE), and how amazingly fun they are to make and read!
Marketing
Our library marketed the program using in-branch fliers and social media, including Facebook, Instagram and Twitter. Since this particular program was part of a larger community art event, we also sent a media advisory to our contacts in the targeted region.
Budgeting
This program can cost you $0 out-of-pocket, as many of the materials required for zine-making are already in most libraries.You essentially only need paper, a writing implement, a photocopier and a stapler, but you can also jazz up your offerings with collage materials, paint or art supplies, typewriters and more. The beauty of a zine is that it can be whatever you want it to be.
Day-of-event Activity
Gather your materials: First and foremost, you need paper. Your zine formatting is only limited to your imagination and available materials, but a good starting point is standard 8.5-by-11-inch paper. You can cut the pages in half horizontally to make a 4.25-by-5.5-inch zine, or use one sheet of paper and some creative folding to make a mini-zine. Get more info and free zine templates here.
Once you have your paper, the rest of the materials for your program are optional and widely varied (are you noticing a theme?).
Here are some ideas:
- Writing implements: pencils, pens, markers, colored pencils, crayons, paint markers
- Weeded library items for collaging: comic books, magazines, picture books, novels, newspapers
- Decorations: stickers, stamps, fabric swatches, ribbon
- Etcetera: scissors, glue, typewriter, long-reach stapler, photocopier, laminating machine
Reserve a table space with plenty of room. Make sure all your materials are easy to reach and that you have trash cans and extra blank paper handy.
During the program itself, your main goal is to keep the creative environment alive. You may answer questions, provide additional materials or show off examples of zines you love. If you’re working on a collaborative zine, make sure to get permission from your attendees to include their page as a contribution to the group project. I also like to create a “Contributors” page that everyone can sign; I add it to the finished product.
After the program, examine all your pages and decide on your layout. Photocopy as many copies as you’d like! Staple the pages together using a long-reach stapler or get creative with different binding methods.
After your zines are created, consider adding them to your library’s collection or distributing them to the participants either in physical or digital format.
Program Execution
We had about 40 people visit our zine station to create pages during the art event. Some people didn't want their pages included in the final zine, so we ended up with about 25 individual pages.
People had a lot of fun making the zines, and many said they were learning about zines for the first time. The participants seemed impressed by the wide variety of zines, and they were excited about the possibilities of creating their own zines at home once they saw how easy it was.
Our cataloging department was willing to enter a zine made by elementary school students into our branch’s reference collection. The students are so proud that their work is now “in a real library.” It gives them a sense of agency and an excitement that will hopefully translate into a lifetime of library use. Another option is to digitize the zine into .pdf format and send it to the participants or host it online.
Your next step is to start planning your next zine workshop!
Advice
I have found from experience that a little bit of background music helps to foster creativity and reduce any awkwardness customers might be feeling.
You can read more about our Zine Workshop on my blog.
Supporting Materials
- Feedback (Coming Soon!)
- Programming Librarian Facebook Group
More Programs
An Interview with the Magpie Librarian
Audiences: