
Give kids and tweens an opportunity to make their mark on the library through this community art project. This outreach program educates patrons about makerspace resources and introduces younger audiences to quilting by inviting them to create their own quilt block for a quilt showcasing their favorite characters from children’s literature.
Advanced Planning
Participants, by coordinating with others to create a community art piece for the library, will learn about the value of collaboration, develop a greater sense of community with their fellow librarygoers, and foster a greater sense of responsibility and partnership in creating a beautiful library space to share. This event is part of a number of community art projects held throughout the year designed to allow patrons to collaborate in the decoration of library spaces during our renovation.
Additionally, this event served as a way to promote the sewing machines we had recently acquired for our library’s makerspace.
Planning for this event started over a month prior to the event itself. All of the prep work was handled by a single staff member (me) and consisted primarily of prepping the quilt blocks and creating the marketing materials.
Materials:
- Rotary Cutter, Quilting Ruler, & Cutting Mat*
- Iron/Ironing Board*
- White Cotton Thread*
- Sewing Notions*
- Sewing Machine*
- Freezer Paper
- Several Boxes of Crayons
- Muslin - 2 ½ yards
- Patterned Fabric for Border - 3 yards
- Fabric for Binding - 1 yard
- Backing Fabric - 2 ½ yards (108 in wide)
- Dish Cloth/Scrap Fabric
- Cardboard
*All of these materials are available in our Library’s Makerspace
Preparation Steps:
- Cut 64 9-inch squares out of cotton muslin and 64 8-inch squares out of parchment paper using a rotary cutter.
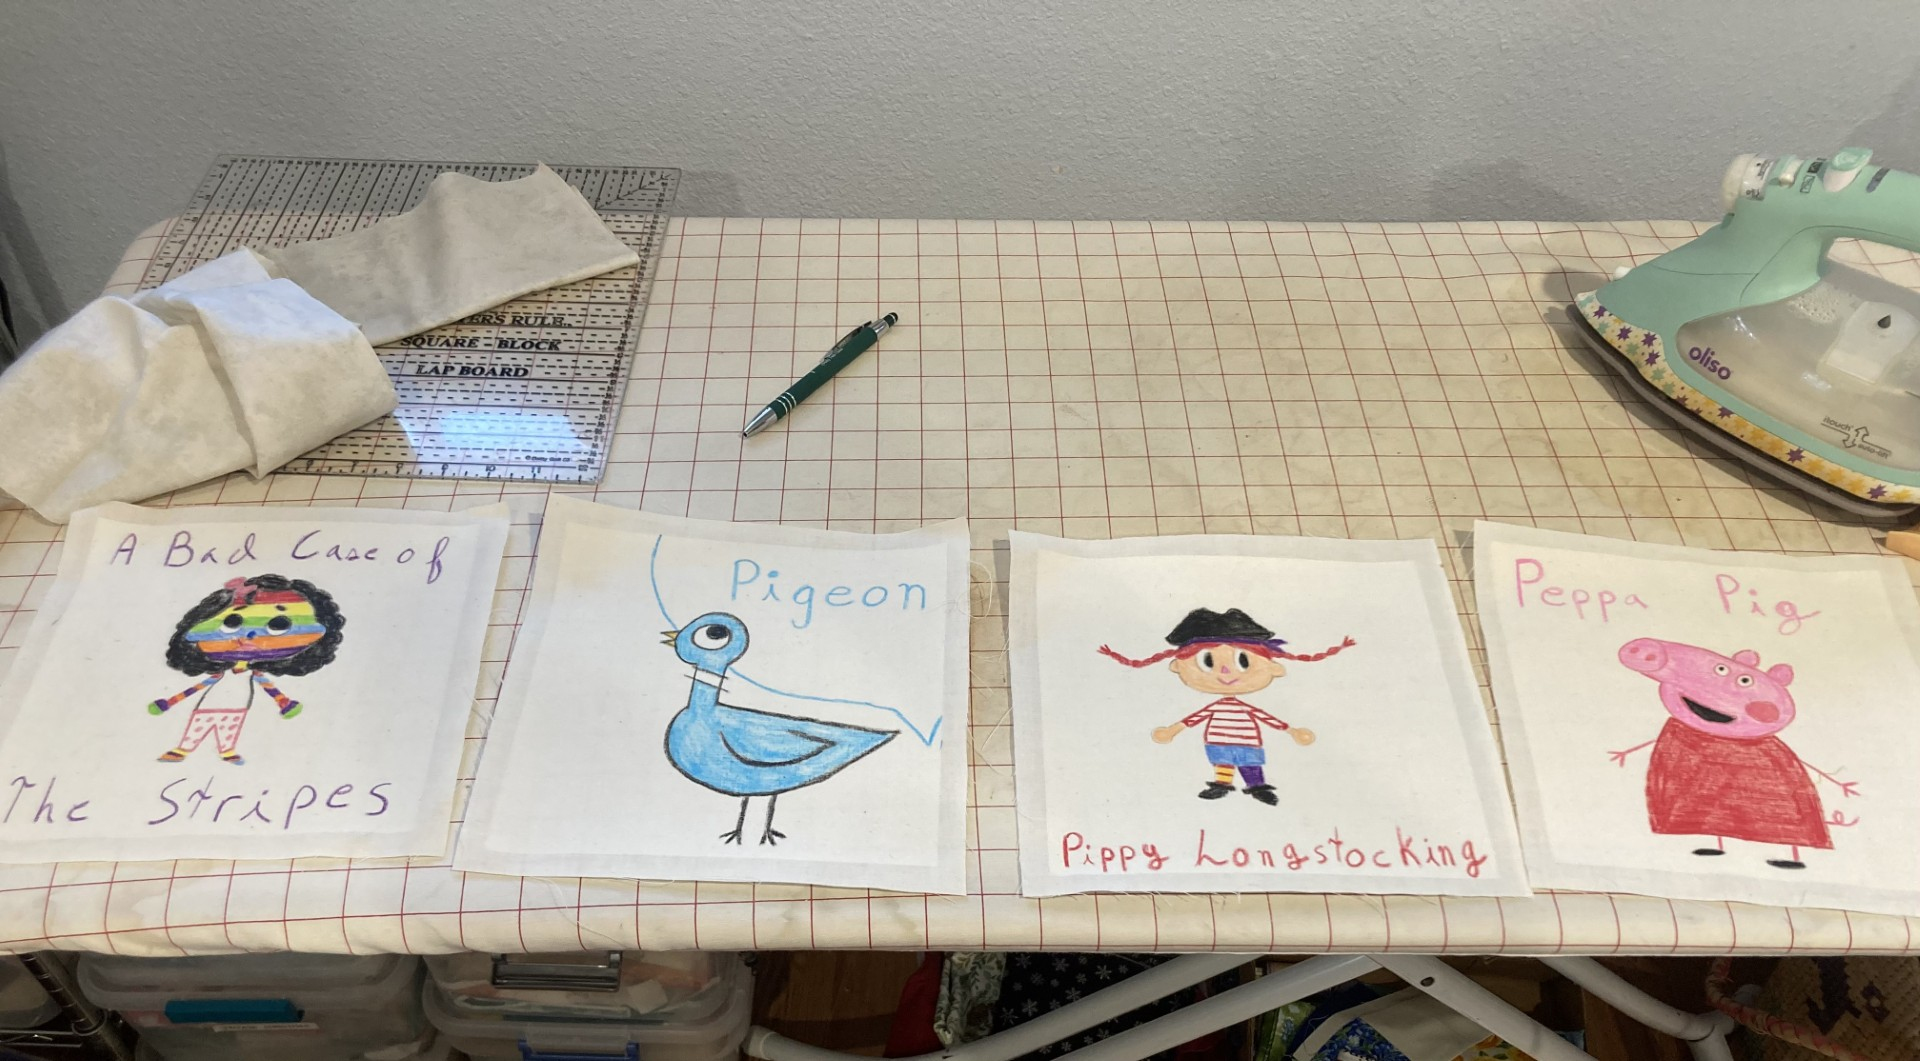
- Place the parchment paper texture-side down, centered on the muslin squares, and iron them together. The parchment paper should stick to the muslin.
- This will make the fabric easier to draw on and serve as a visual reminder of which parts of the fabric disappear into the 1/4-inch seam allowance in the final product.
- Set aside around 25 blocks and use a black crayon to draw the outline of a popular children’s book character or an outline of a chibi body on it. It should look like a coloring book page when completed. I freehand drew many of these, but for more complex designs, feel free to use a coloring sheet as a template to draw the outline.
- Optionally, use cardboard to create stencils of popular children’s book characters. I recommend prioritizing the creation of stencils that can be used for multiple characters. For example, the outline of a Care Bear can be used for any number of Care Bear characters. The same is true for My Little Pony or the Teenage Mutant Ninja Turtles. Doing this helps to create an intermediate level of difficulty for kids with artistic skills more advanced than coloring in but may not be confident enough to freehand a specific character.
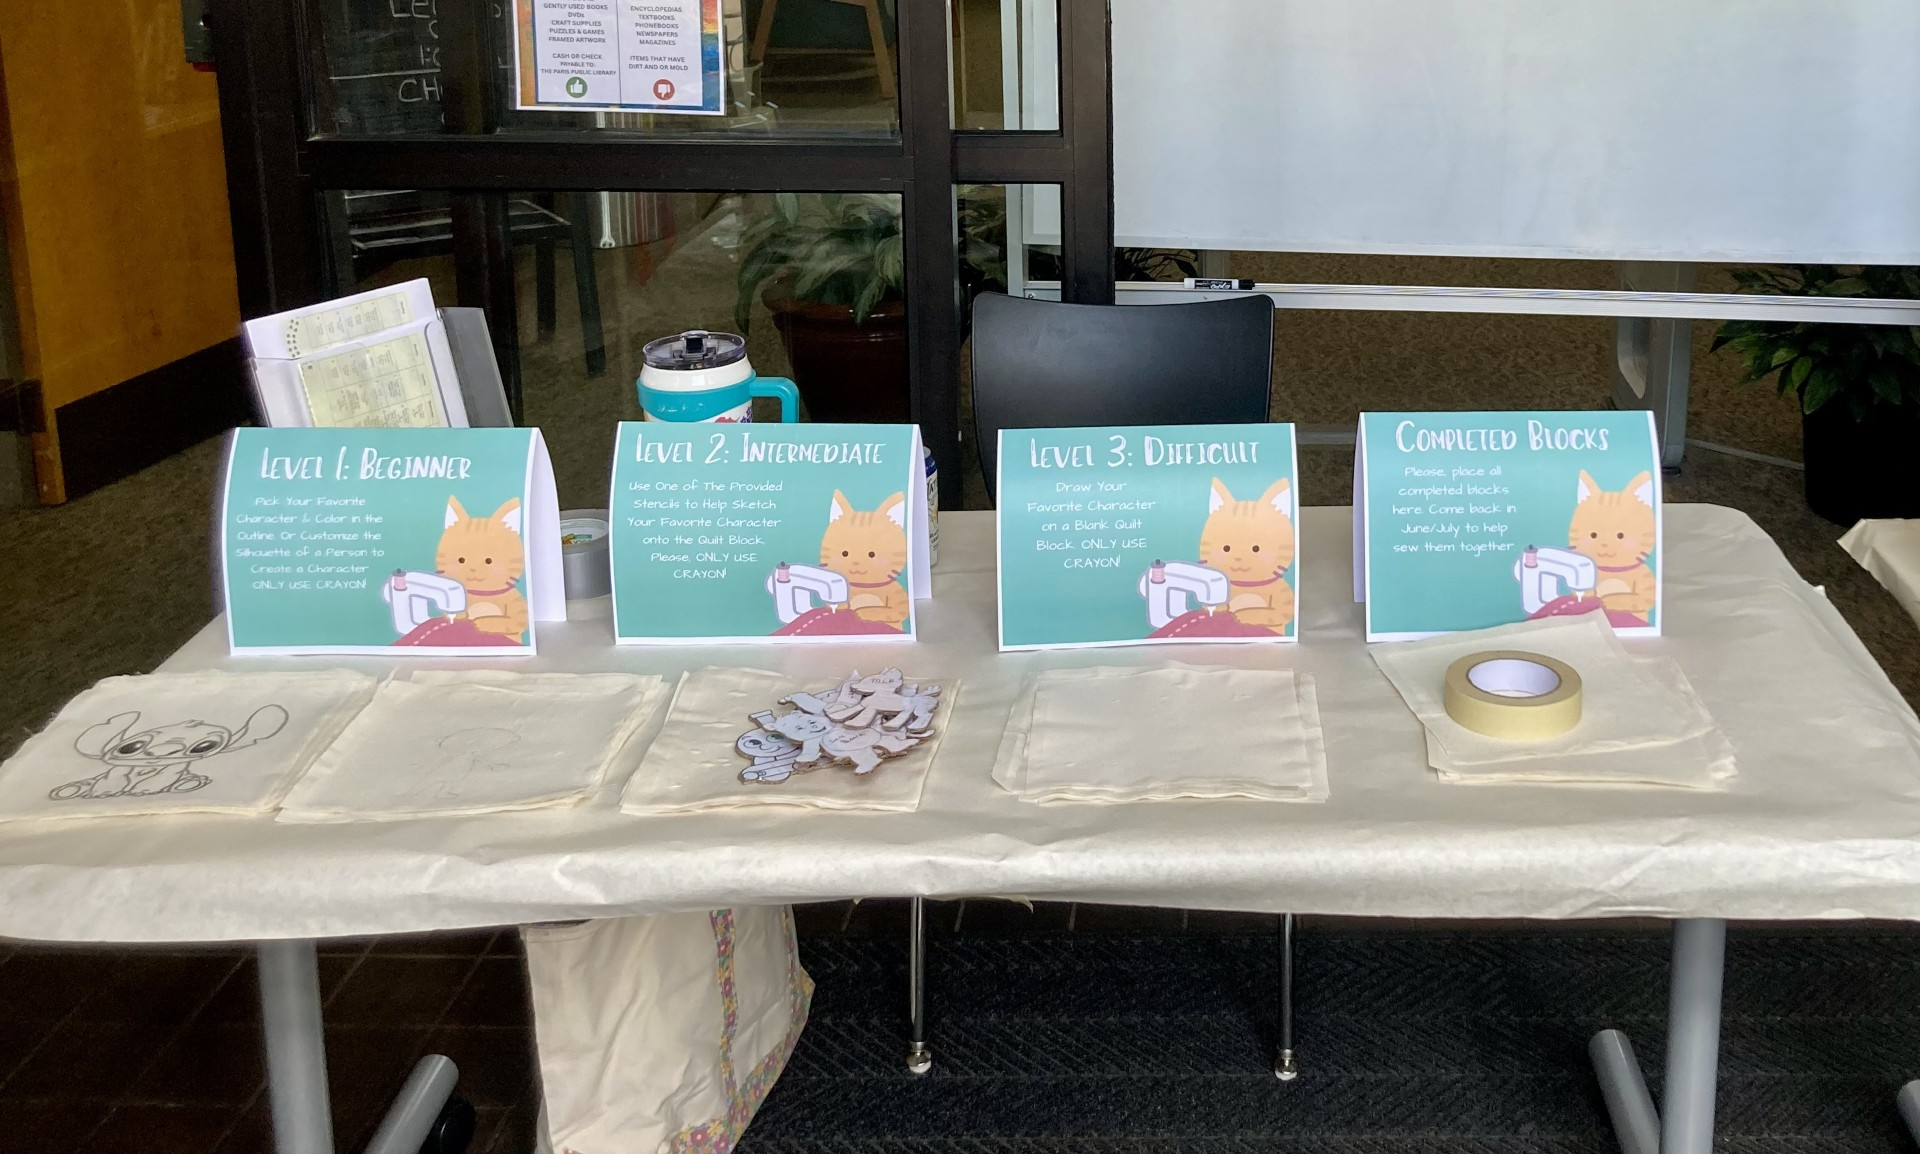
- Create signs for beginner/intermediate/difficult levels. So that the blocks can be separated into levels of difficulty based on age/ability.
- Create marketing materials - Facebook posts, flyers, posters, etc.
Completion Steps:
- Use a dish towel or scrap piece of fabric to protect the iron when melting the wax into the fabric. Iron for one minute on each side of the fabric, or until the scrap fabric comes away without any color transfer, to ensure the wax is fully melted/set into the fabric.
- Assemble the quilt by sewing the squares into rows and then sewing the rows together.
- Tip: iron the seams of each row in alternating directions so that the seams nestle when you pin the rows together. This will ensure the seams line up all the way down the quilt.
- Send it off for long-arm quilting (where the front/batting/back are sewn together).
- Then cut, iron, and sew the binding to the Quilt.
- Because we choose to hang up our quilt for display, we also tacked on a tube of fabric that allowed the quilt to hang from the wall the same way a curtain would. There are several methods to achieve this, but the one used here is detailed below:
- Measure the quilt width across the top edge.
- Cut a piece of fabric 8 ½” by the quilt width.
- Turn each short end under ¼” twice. Stitch down to finish the edge.
- Fold the fabric, wrong sides together and raw edges matched, along the length and press a crease along the fold.
- Open the fabric. Now bring each long raw edge to that pressed center fold and press new creases along those folds.
- It is not necessary to keep the pressed center fold made in Step 4. Its only function was to provide a line for Step 5 without marking the fabric.
- Now fold the long fabric wrong sides together and stitch along the long edge using a ¼” seam. Press the seam open without disturbing the creases pressed in Step 5.
- When you fold the sleeve along the pressed folds from Step 5, you will notice that the side with the seam is smaller than the side without the seam. This “give” allows the hanging rod to pass through without distorting the shape of the quilt front.
- With the seam side down, center the sleeve across the width of the quilt and about ¾” below the quilt’s top.
- Pin in place, putting pins at each end first to help keep the top of the sleeve straight. Do not “eyeball” the distance from the top of the sleeve to the top of the quilt when pinning. If the top of the sleeve is stitched on in a wavy pattern, the quilt will not hang well.
- Blind stitch in place along the folds of both long edges.
- To make it impossible for a rod to push between the sleeve and the quilt (rather than through the sleeve), also blind stitch the bottom edges of each end.
Marketing
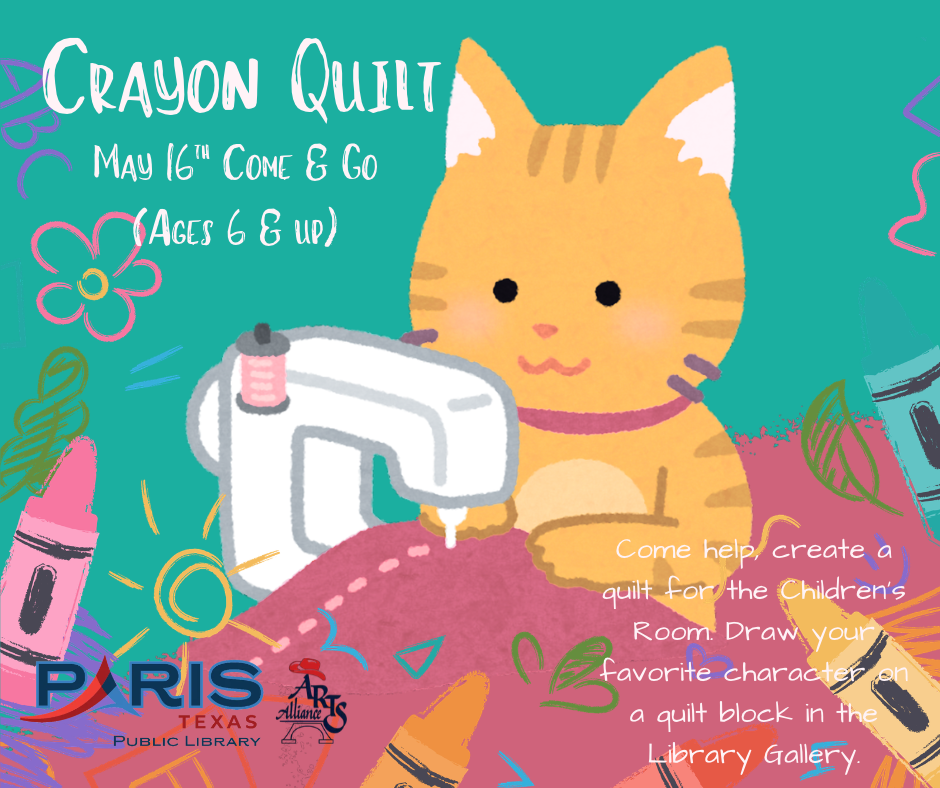
The event was held during the Paris Art Faire hosted by the Paris Area Arts Alliance. We lent them our parking lot as one of the venues for the event (all the children’s art was displayed on our patio & several activities for children, like face painting, were set up nearby), and in exchange, they advertised the program as part of the festival. In addition, we posted about the event on Facebook, added it to the library’s community calendar, and placed fliers around the library.
This proved to be a very successful partnership/strategy. Although the festival didn’t end till 4 pm, we started out with 68 blocks to color around 9 am that morning and ran out of blocks just a bit past 1 pm.
How much of this can be attributed to word-of-mouth spreading among festival-goers on the day of, and how much to advertising ahead of time, is a bit unclear. It took a couple of hours for participation to really pick up, but from 11 am onward, there were always several children/ tweens/teens participating in the event.
Budgeting
The materials associated with the library’s makerspace incurred no additional cost for our library. I quilt as a hobby, so I already had all the tools needed even if the library itself wasn’t able to provide them. I recognize this isn’t the case for all libraries. As such, I would argue that this project is best suited to libraries that already have sewing machines either as part of their Library of Things or Makerspaces.
In terms of consumables, this is the material cost breakdown:
- Freezer Paper - approx. 7.00$
- Several Boxes of Crayons - 33.42$
- Muslin - 2 ½ yards - 22.50$
- Patterned Fabric for Border - 3 yards - 40.89$
- Fabric for Binding - 1 yard - 6.00$
- Backing Fabric - 2 ½ yards (180 in wide) - 21.00$
Additionally, the longarm quilting required to finish the project (this is when the front & the back of the quilt are sewn together with batting in the middle) for a quilt of this size would regularly be priced at 80.00$. In our case, we incurred no additional costs for this process, as the cost of quilting was donated.
Total Cost: $210.78 (including quilting)
The cost of fabric depends heavily on the final size of the quilt and the fabrics you choose. A similar project can be achieved at a lower cost by making a wall hanging (anywhere from 20 in by 20 in to 25 in by 30 in) instead of the full-sized quilt produced by this project.
And strictly speaking, a border isn’t essential at all, so you could skip that step. I chose a directional fabric for the border, which necessitated buying an additional yard so the pattern would all line up, but that’s a personal preference for finishes and not essential.
If you have a confident quilter on staff, the longarm quilting can be achieved on a traditional sewing machine, albeit with considerably more time and effort. So, that is another cost that can be minimized if staff time is available to dedicate to it.
Also, it’s not necessary to buy fresh crayons for this project. If you have any used crayons lying around, they will work just as well.
Day-of-event Activity
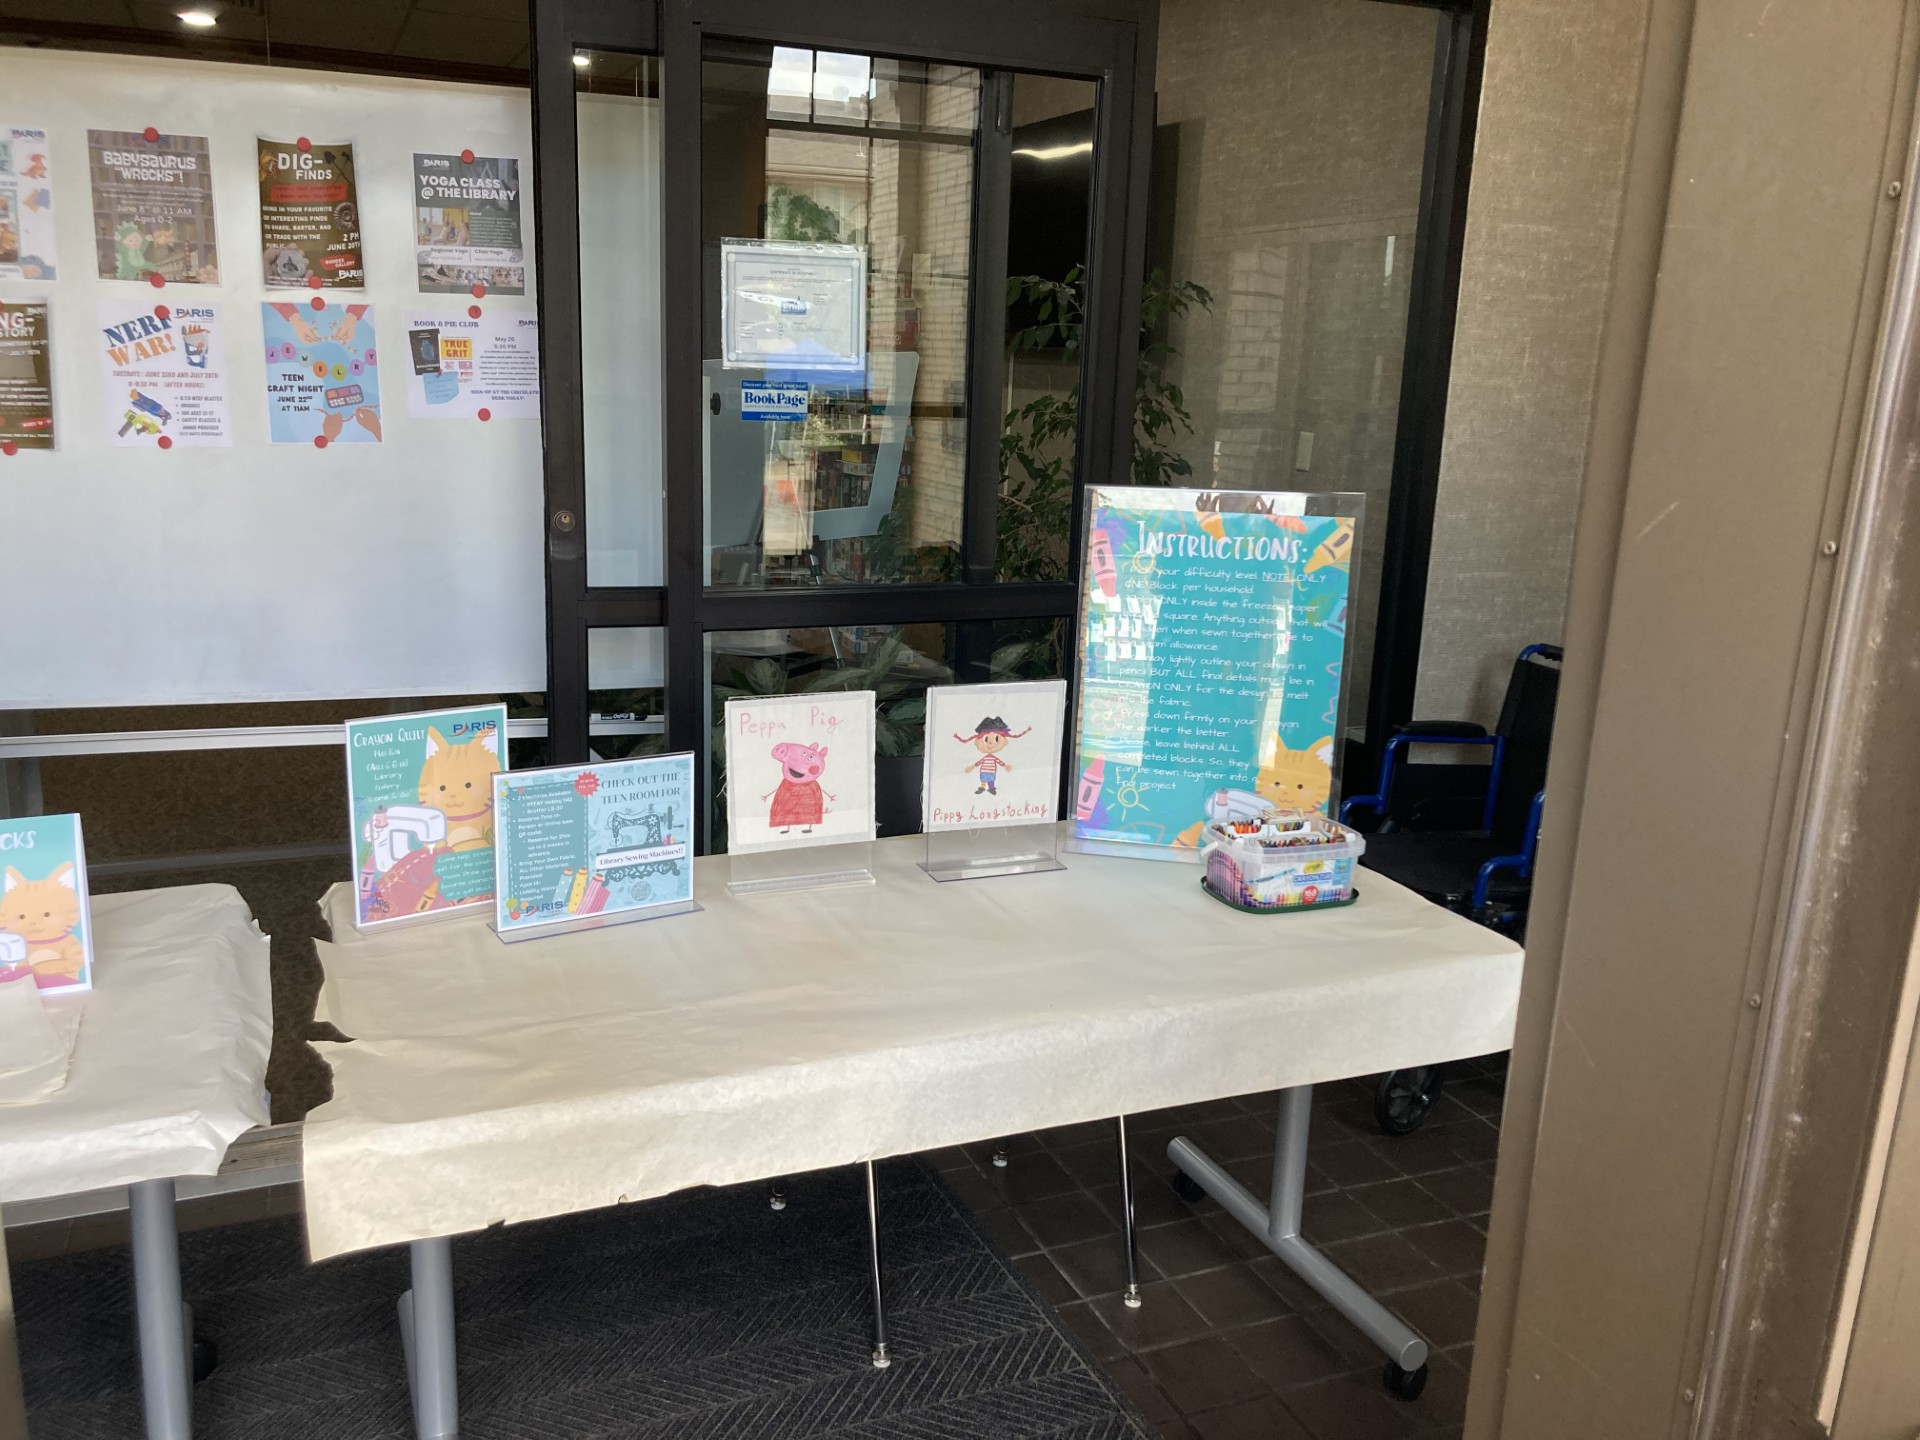
The day of, we set up two tables covered in parchment paper (this allowed kids to test the crayon’s color on the paper before committing to the fabric) and split up the quilt blocks into three stations based on level of difficulty.
The beginner's station included 15 blocks with pre-drawn character outlines, and 10 blank chibi people outlines to add identifying features to create their favorite character. The intermediate station included a stack of quilt blocks and a number of character stencils (including Bluey, Care Bears, My Little Pony, TMNT, etc.). The difficult station simply had blank quilt blocks for the kids to free draw on.
Two staff members supervised the table and provided assistance/further instruction when needed. The instructions for how to participate were available on a poster kept on the table, but staff did need to reiterate these instructions for the littlest participants:
- Pick your difficulty level.
- NOTE: ONLY ONE Block per household.
- Color ONLY inside the freezer paper-backed square. Anything outside that will be hidden when sewn together due to the seam allowance.
- You may lightly outline your design in pencil, BUT ALL final details must be in CRAYON ONLY for the design to melt into the fabric.
- Press down firmly on your crayon. The darker the better.
- Please leave behind ALL completed blocks so they can be sewn together into a final project.
For the most part, the project went off without a hitch. Having staff supervision and various levels of difficulty available ensured that there were very few quilt-blocks decorated exclusively with scribbles. There were times when children who were at a beginner level wanted a character from one of the stencils, but parents and staff were able to assist them in using the stencils to create an outline. And I was able to quickly freehand a couple of character outlines on demand when children wanted to color in a character that wasn’t available to them.
The biggest hiccup was the need to move the program inside, as it was particularly windy that day, and those weather conditions were not conducive to making sure none of the fabric blew away.
Program Execution
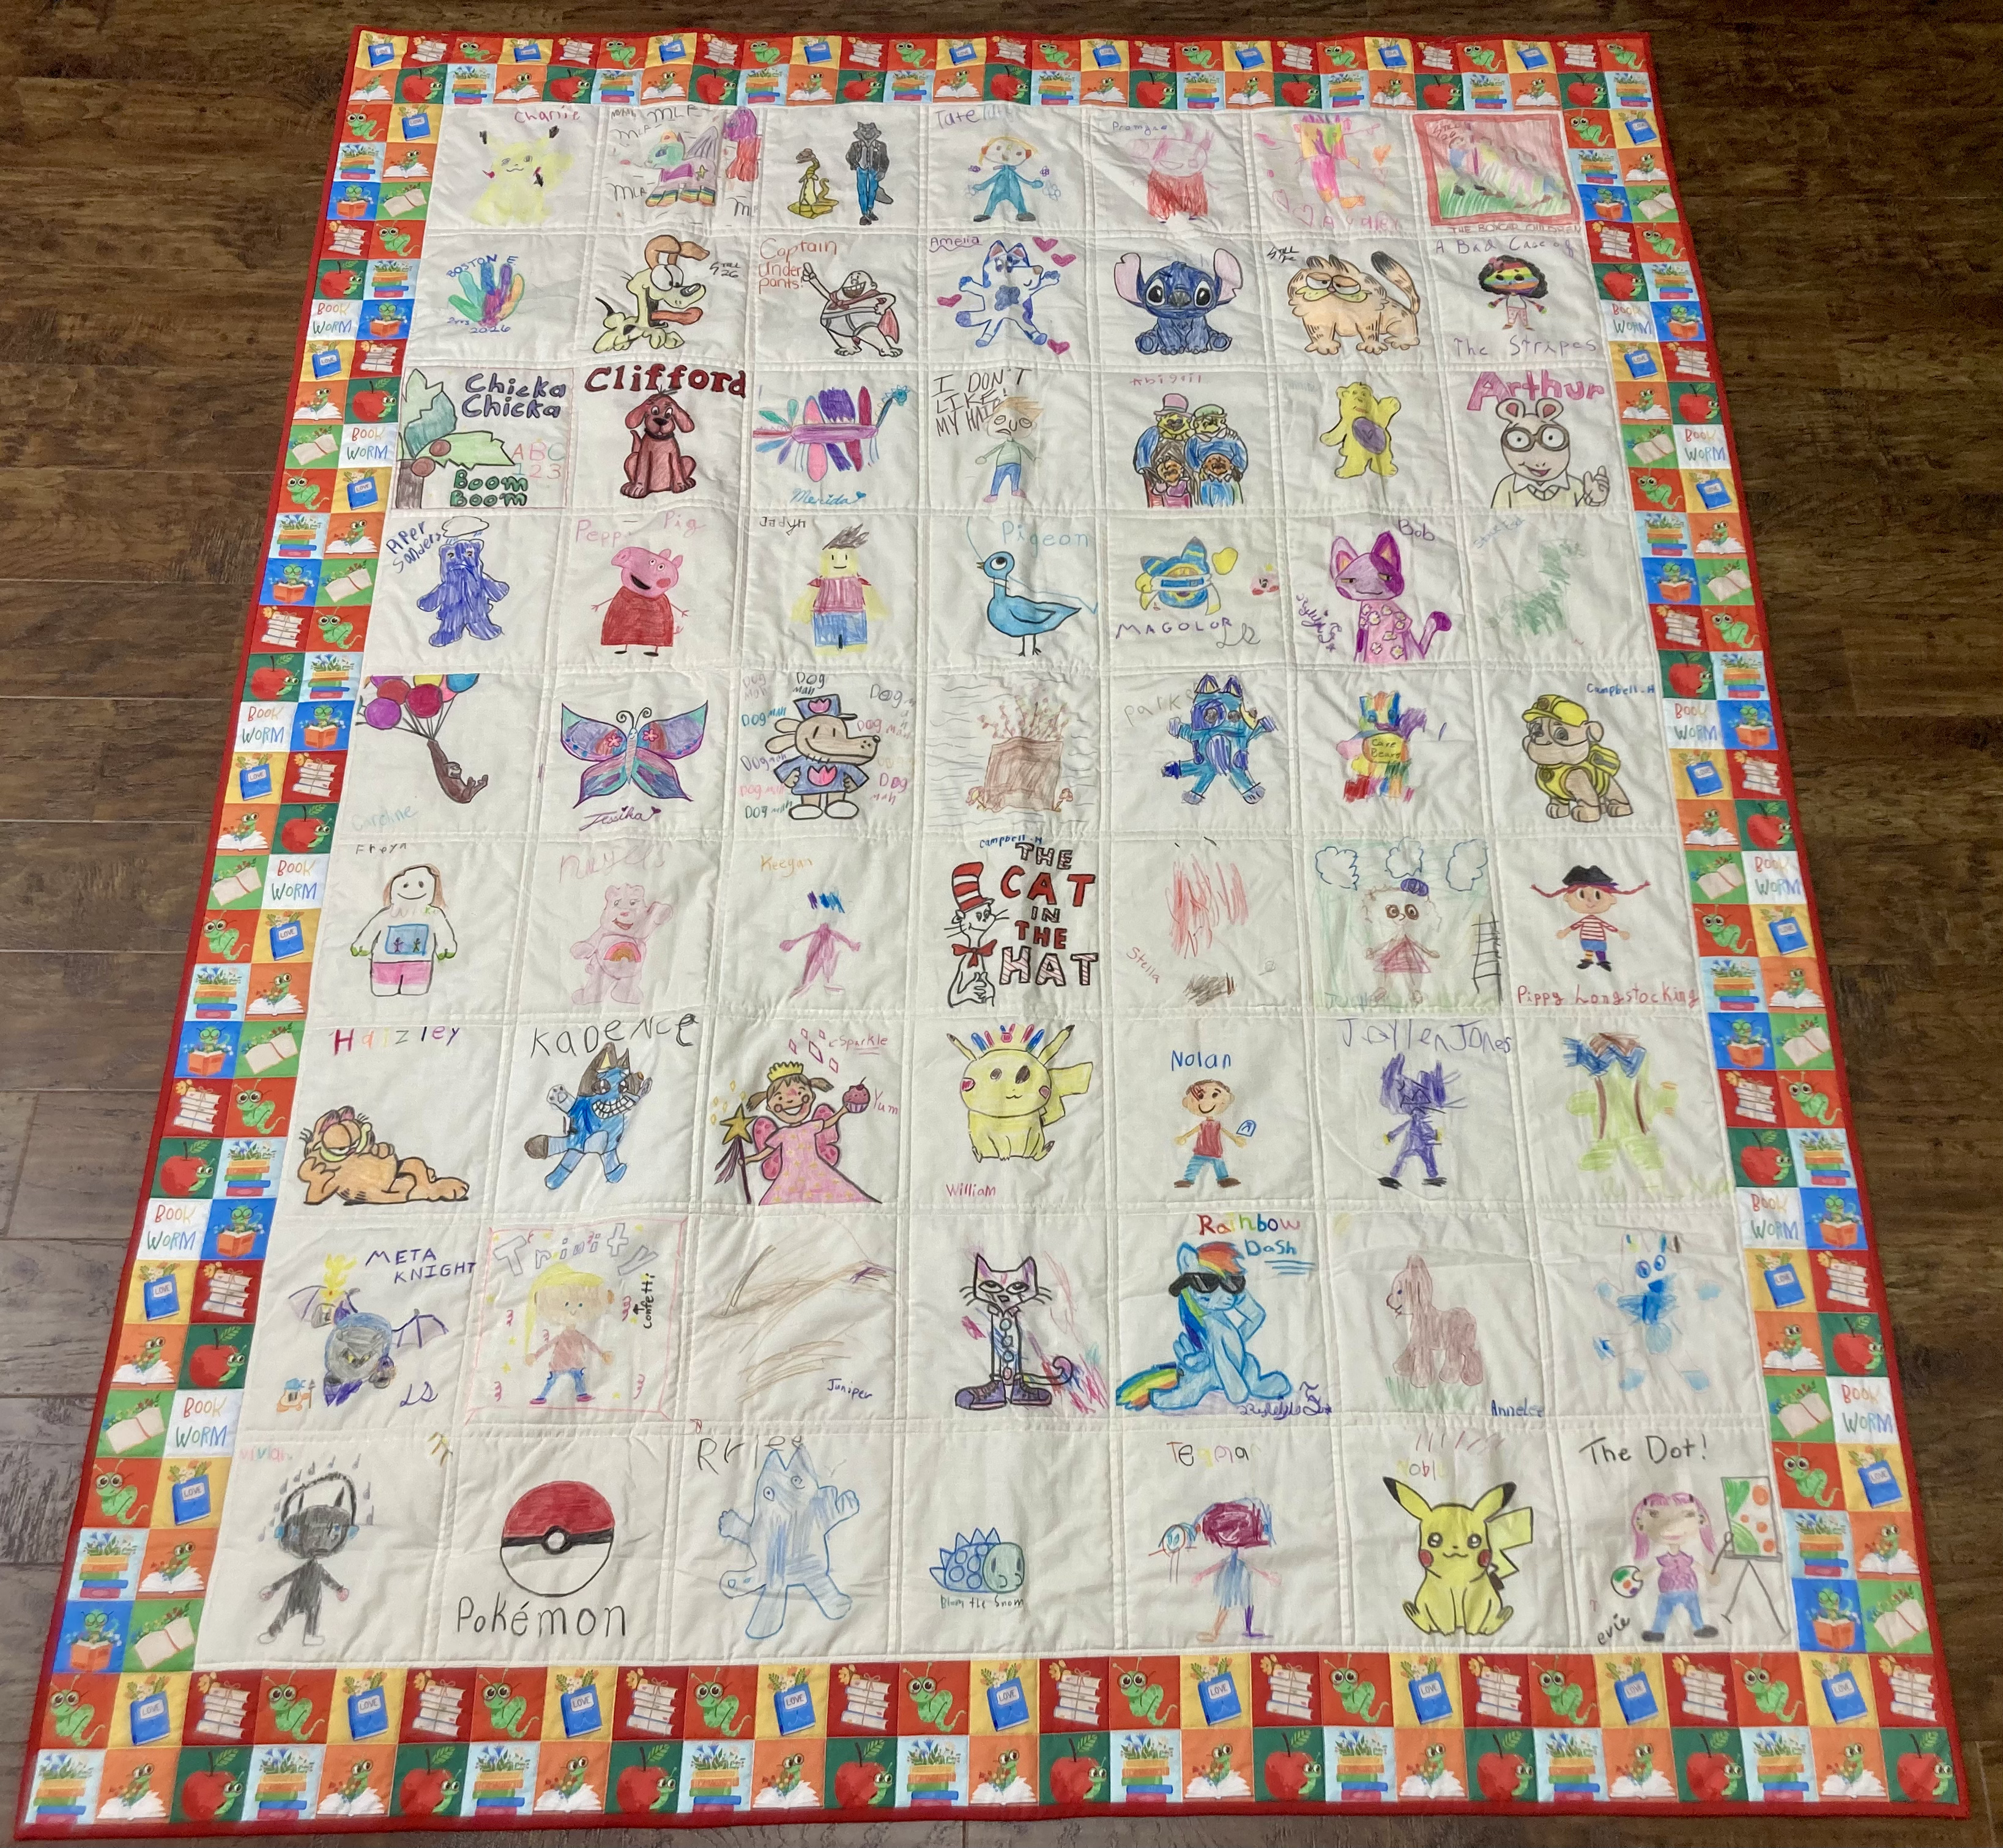
The day of our booth started out rather slowly. The concept of a crayon quilt required a bit of explanation for children/parents to grasp. But by the end of the program, we had over fifty children, tweens, and teens participate by coloring in or drawing a character on a quilt block. With all sixty-eight blocks completed before the event even finished, we handily achieved our goal of making enough quilt blocks to create a community quilt for display in the children’s room.
The feedback from the event was overwhelmingly positive, with many parents/children checking in over the next month to hear how the quilt was progressing. And when we finally unveiled the finished product on the library’s social media pages, that feedback was also very positive. Plus, the kids who participated love to see their artwork on display in the library.
Advice
I would recommend not splitting up the beginner difficulty into pre-drawn character outlines and blank chibi people. By the end of the program, all we had left were the chibi outlines, and the children really struggled with adding features to them to draw their favorite character (see the Pippy Longstocking example). Instead, I would prioritize having at least a third of the blocks be pre-drawn character outlines that serve as coloring pages. Older children can easily complete a coloring page, but younger children sometimes struggle to draw freehand. So, privileging them in this way ensures the best outcomes and prevents frustration when the pictures in their heads don’t align with the pictures their hands create.
Additionally, a number of children returned multiple times to color another block. Early in the program (out of fear of poor turnout), we allowed them to color multiple blocks, which later created a shortage of beginner blocks. I recommend sticking to a one block per child rule to ensure that the greatest number of children/tweens can participate.
Also, we had a handful of high school and college students who wanted to participate. We said yes, and I recommend you do so too if the opportunity arises. Their skill added a lot to the final project, and it was a great way to connect with a demographic that is often difficult to reach with library programming. The interaction allowed us the opportunity to ask about what they would like to see at the library.
Supporting Materials
Slideshow Images
More Programs

Community Quilt Project
Audiences:
Community-Made Granny Square Afghan
Audiences:
