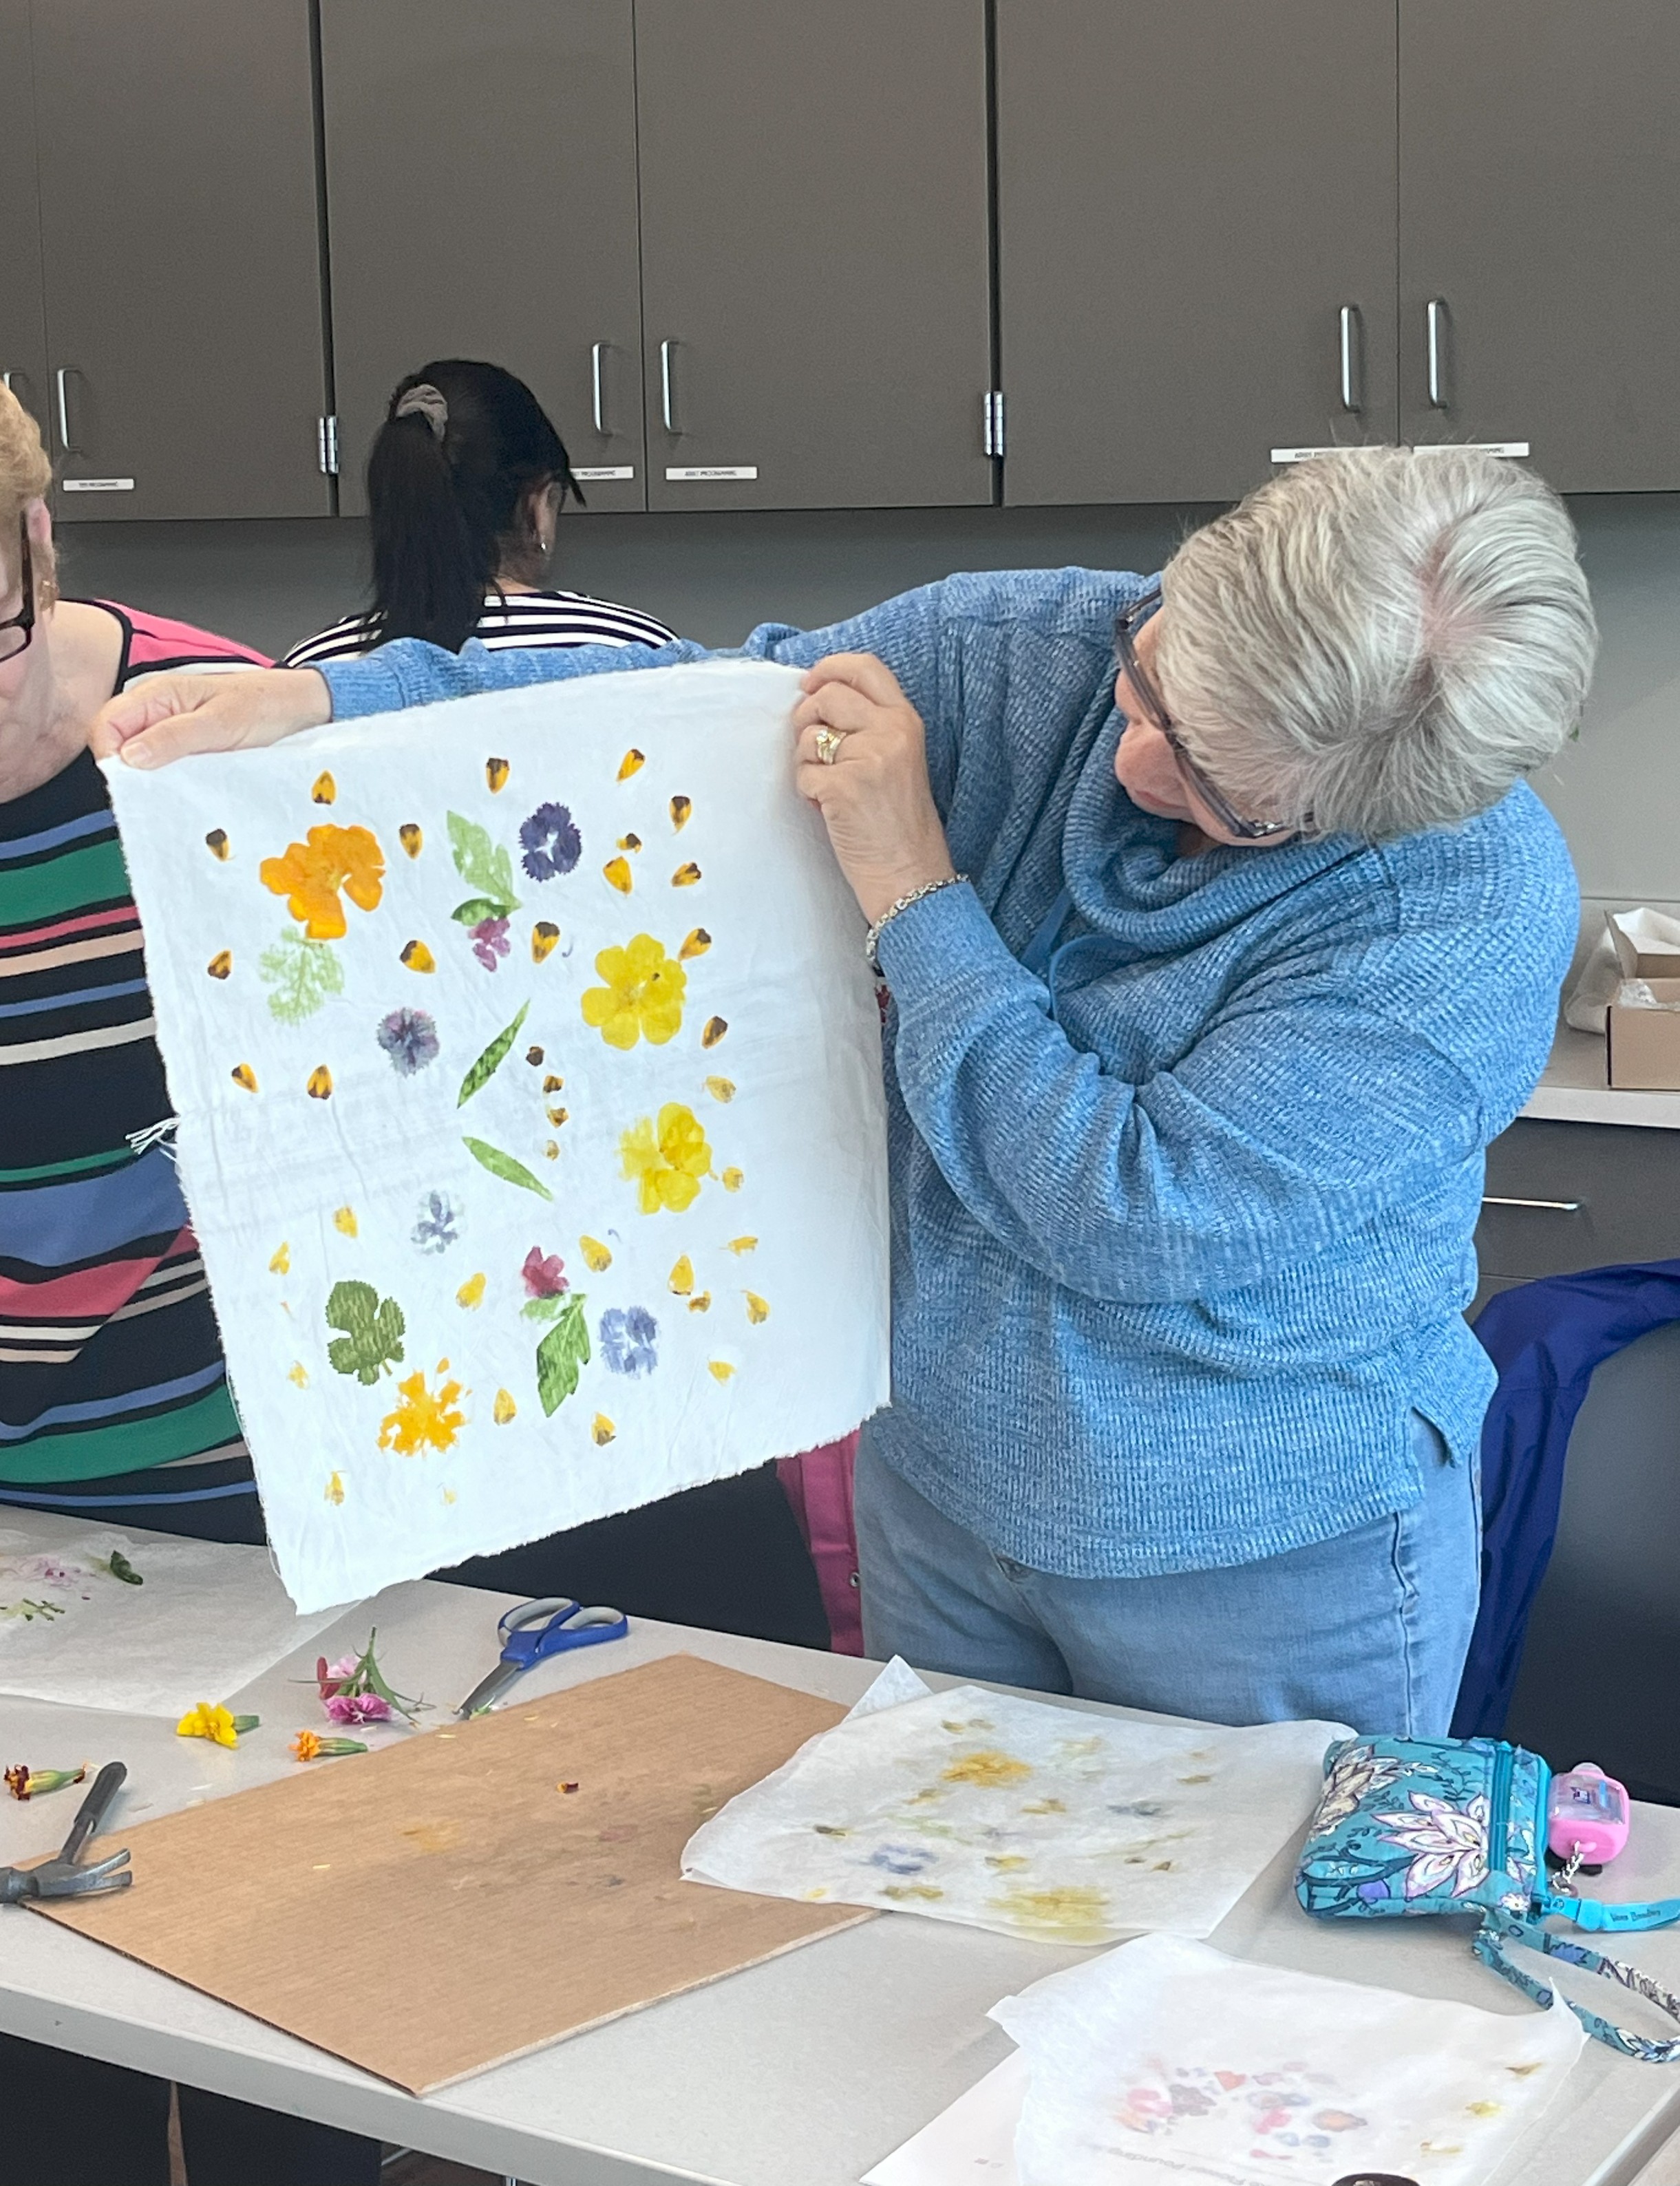
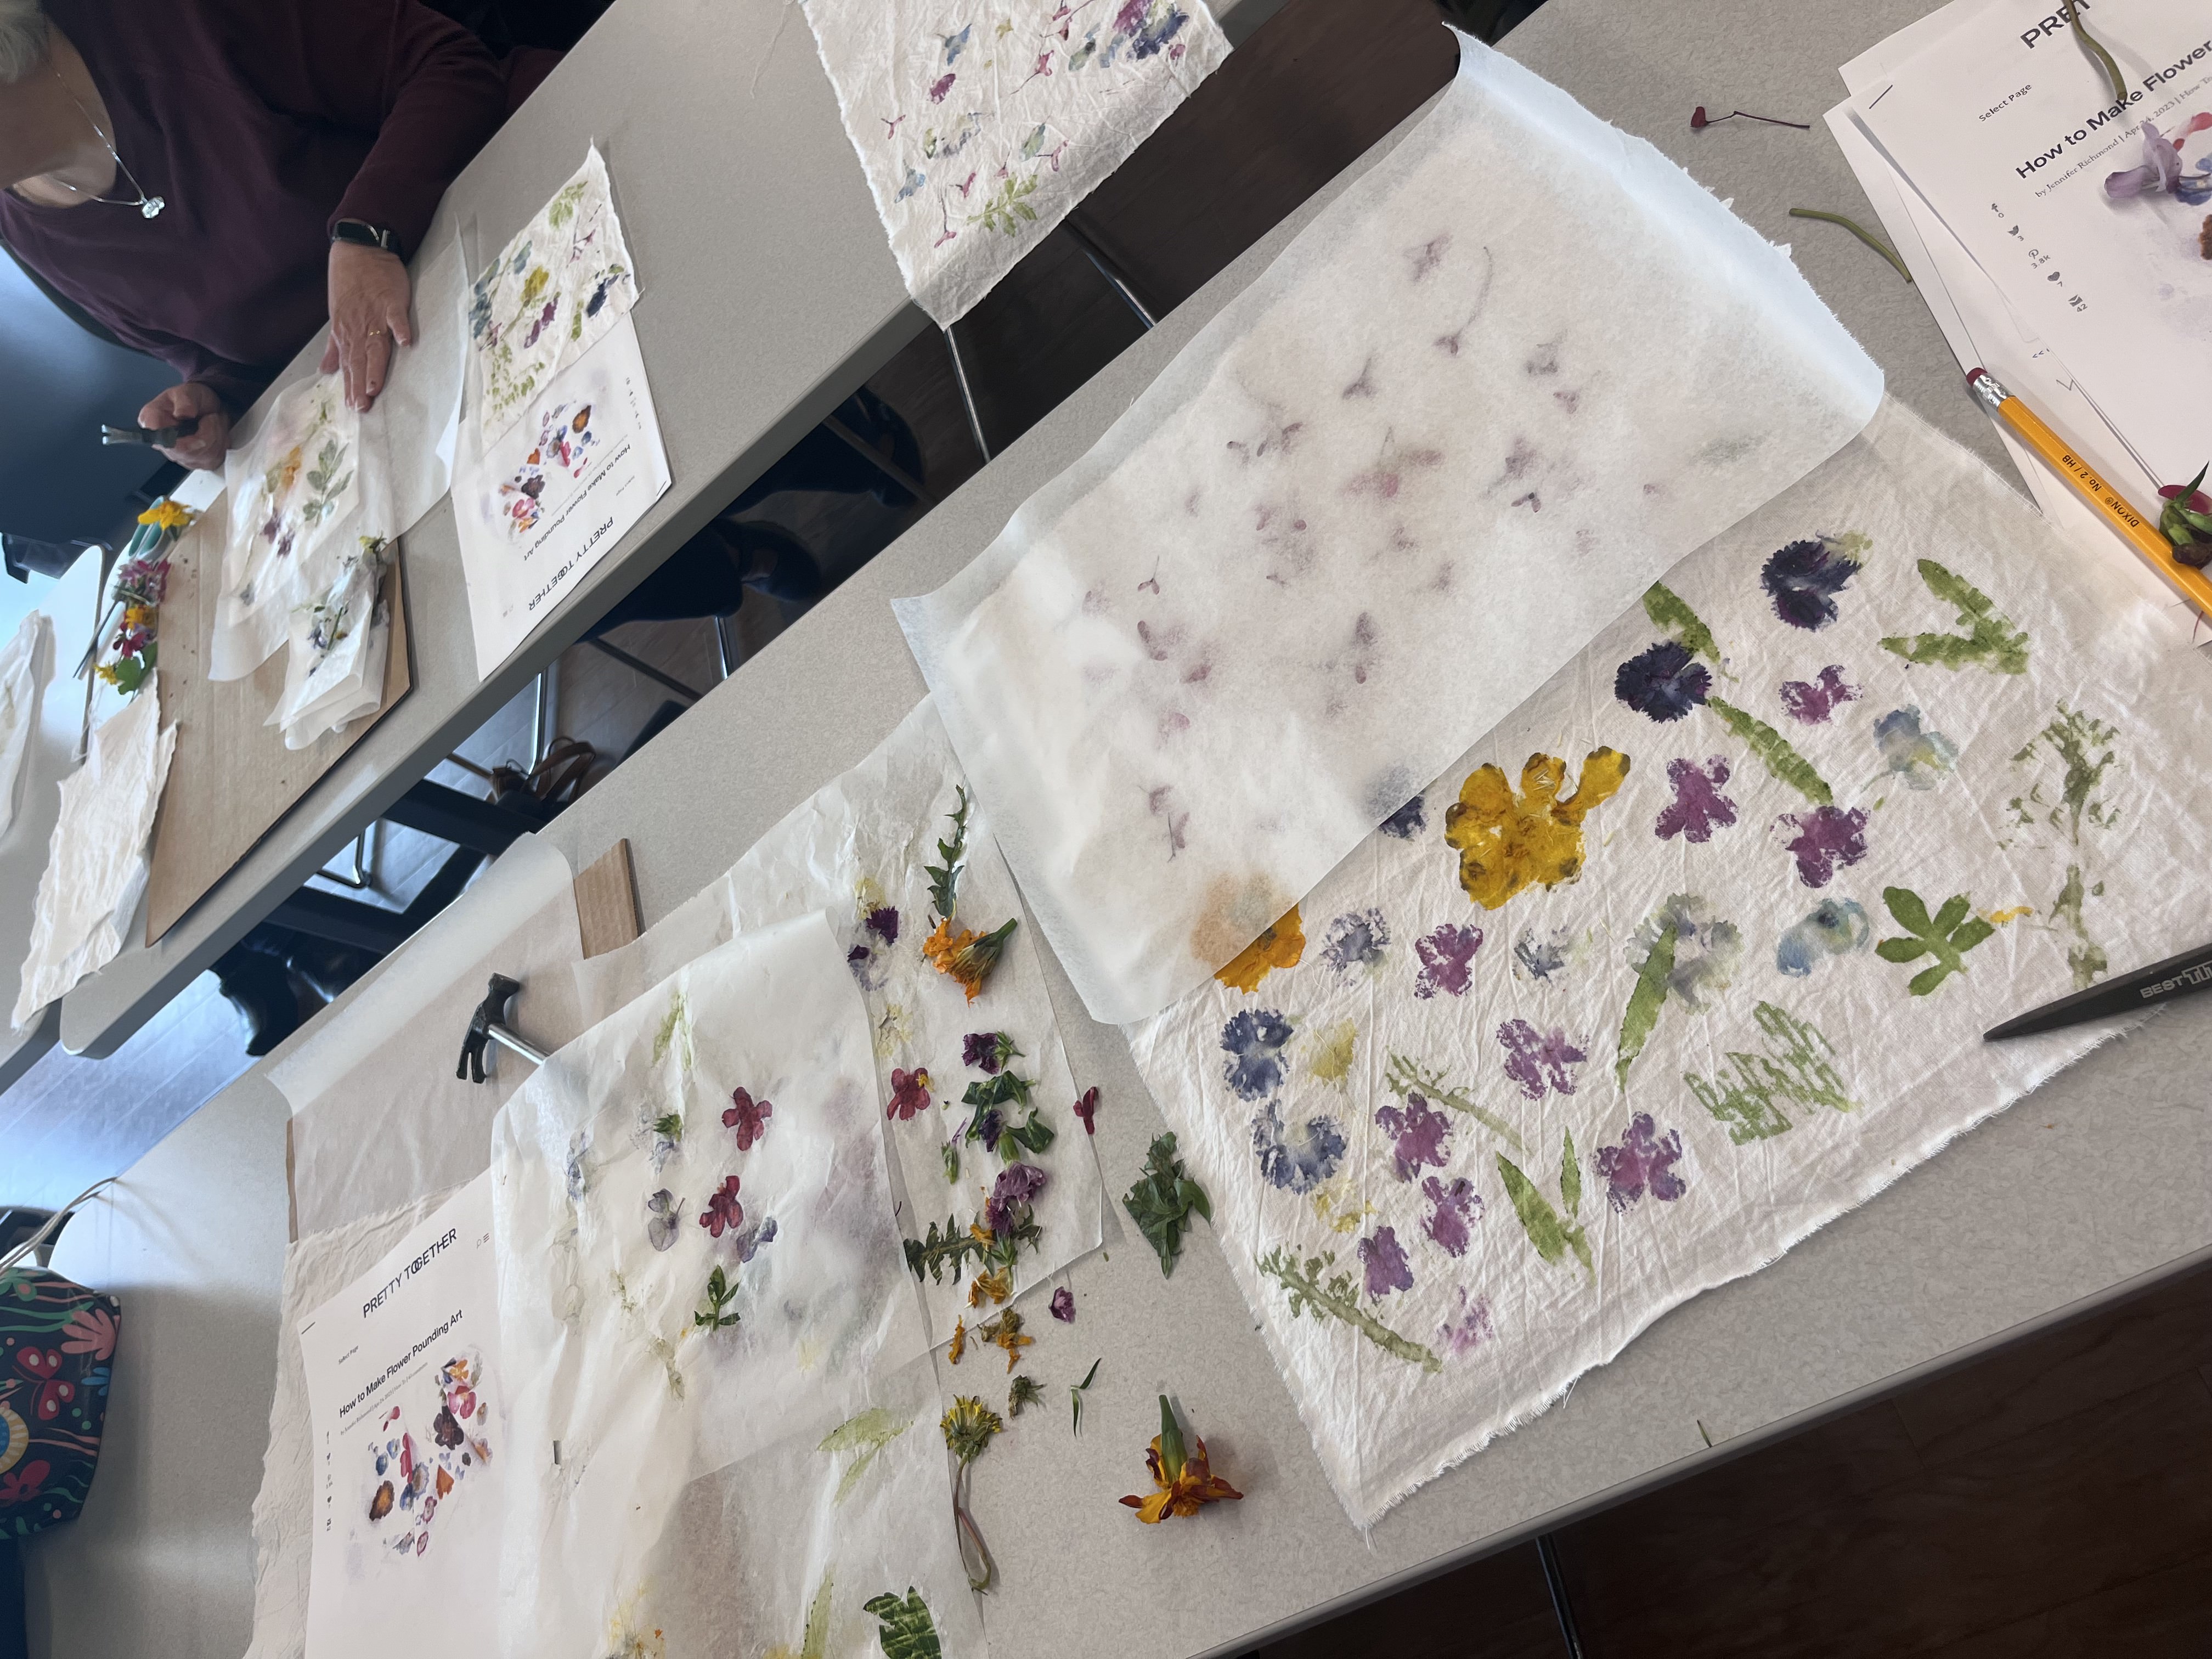
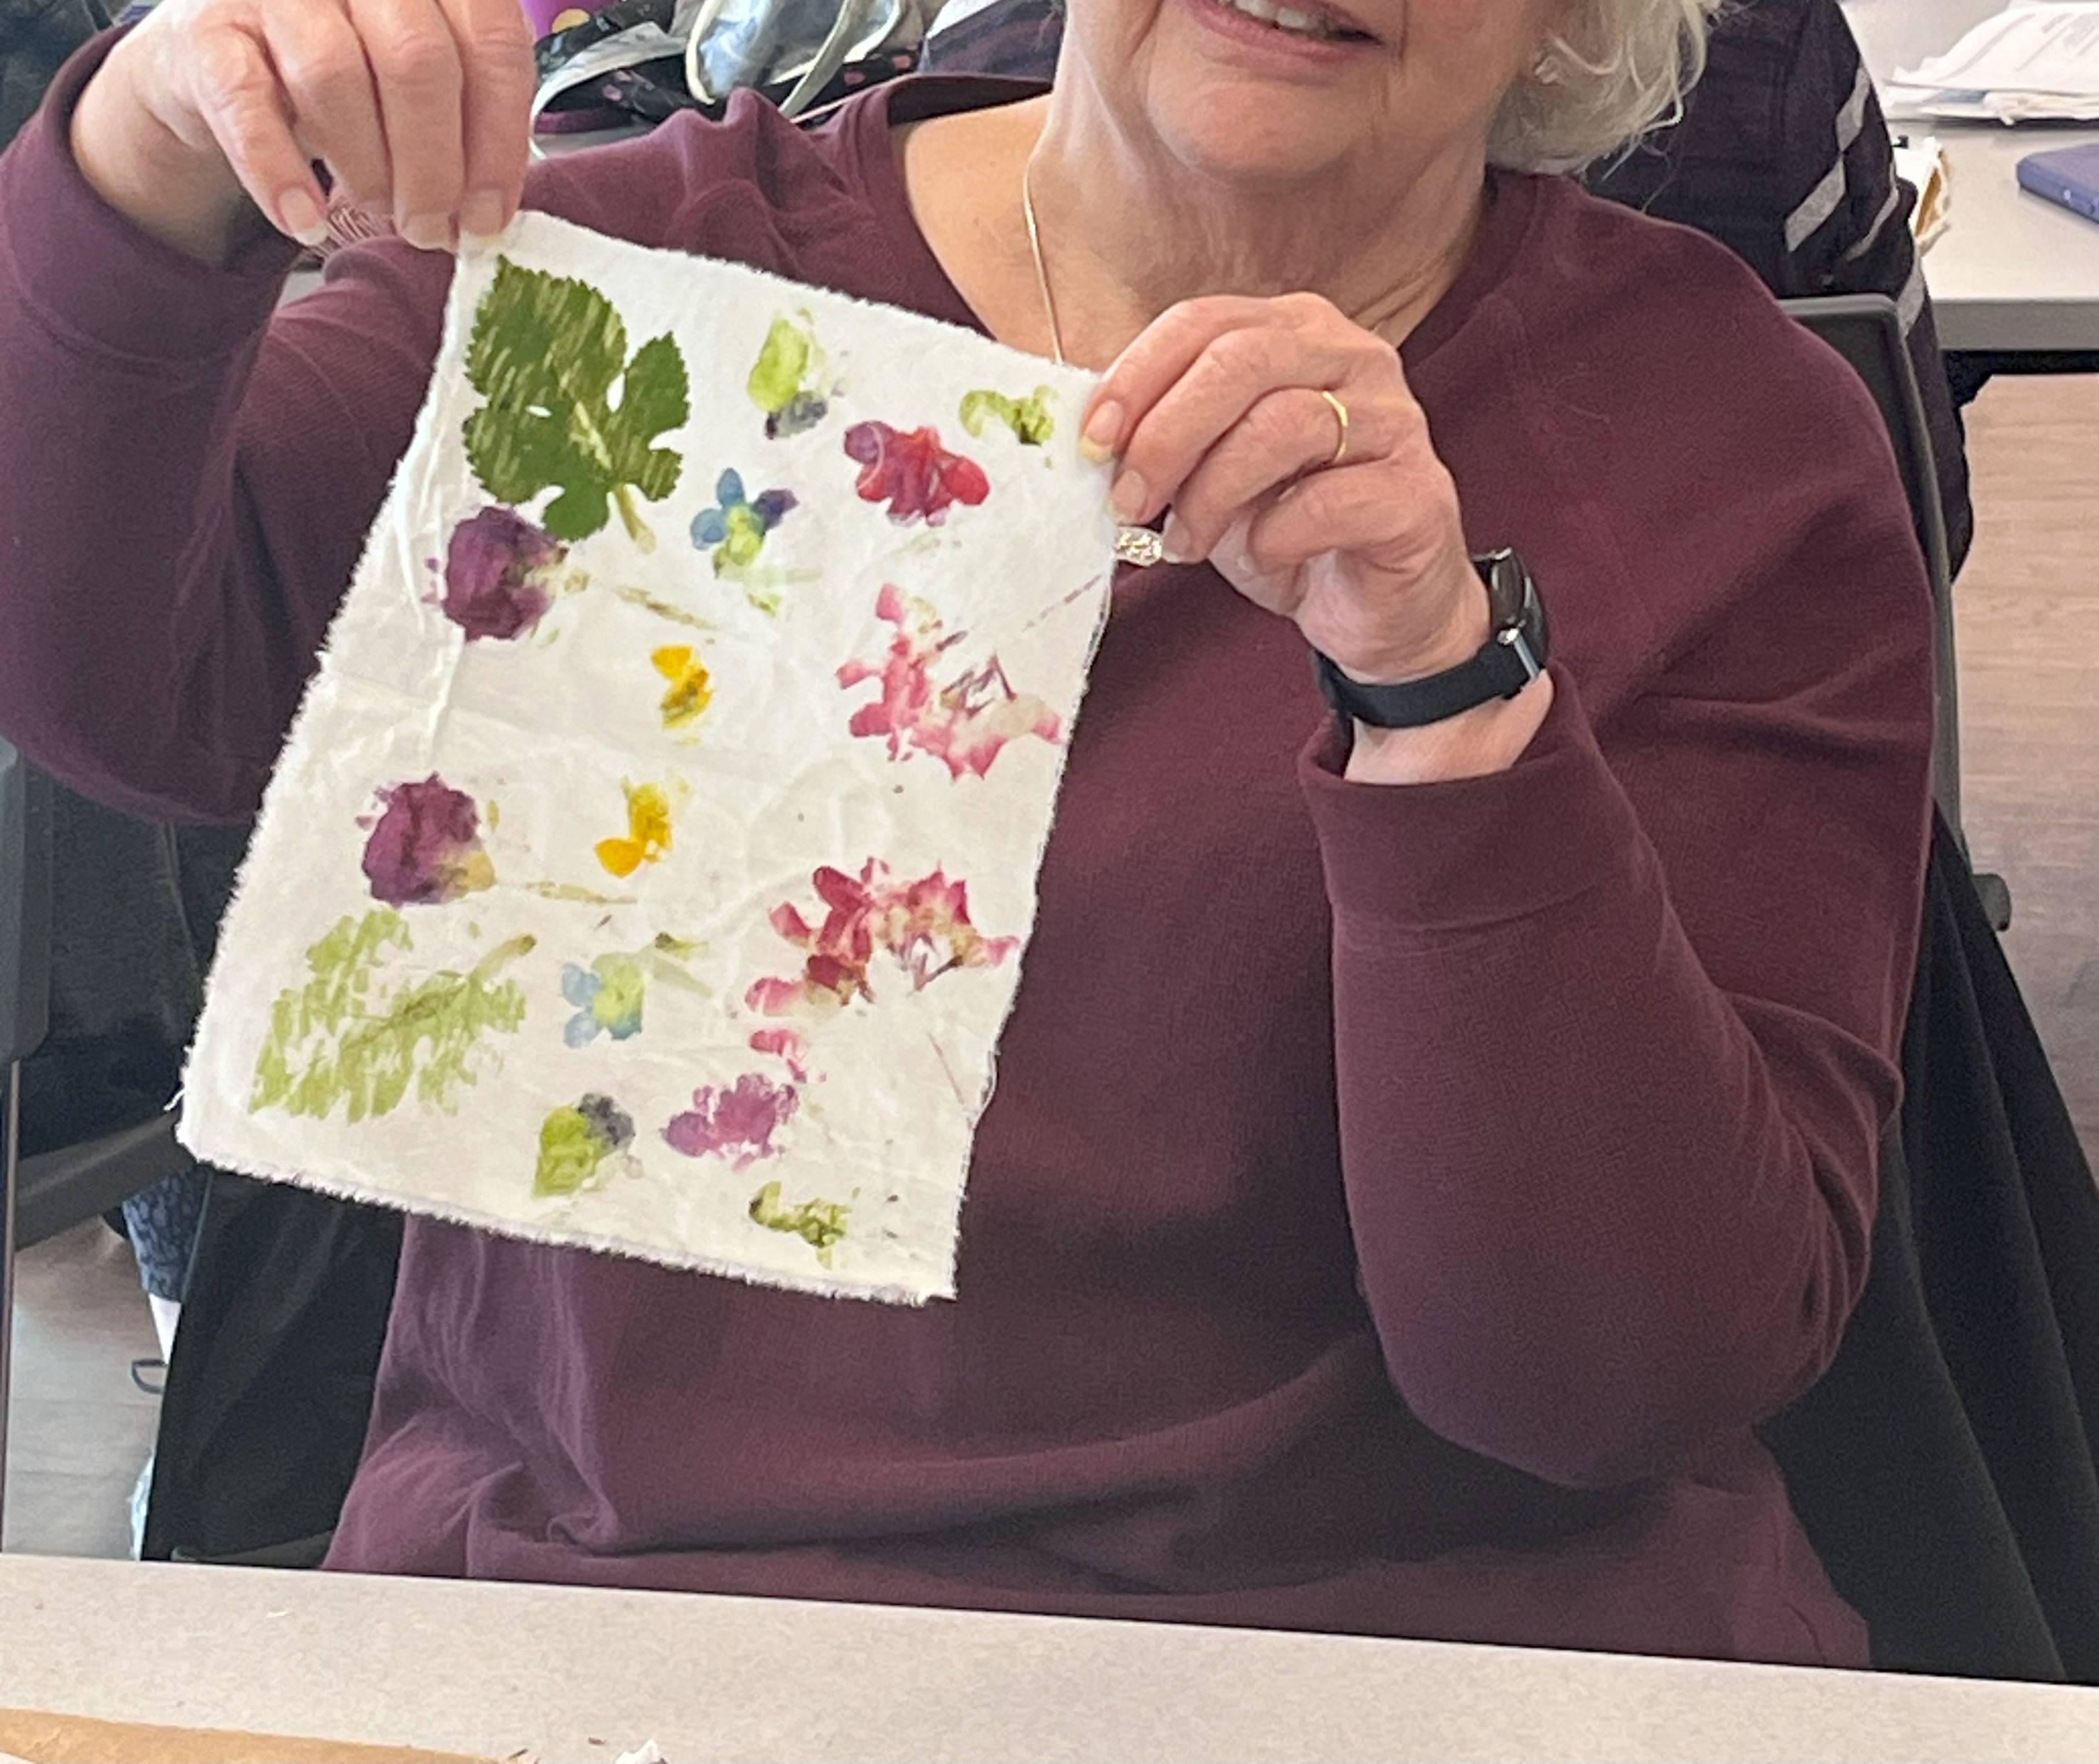
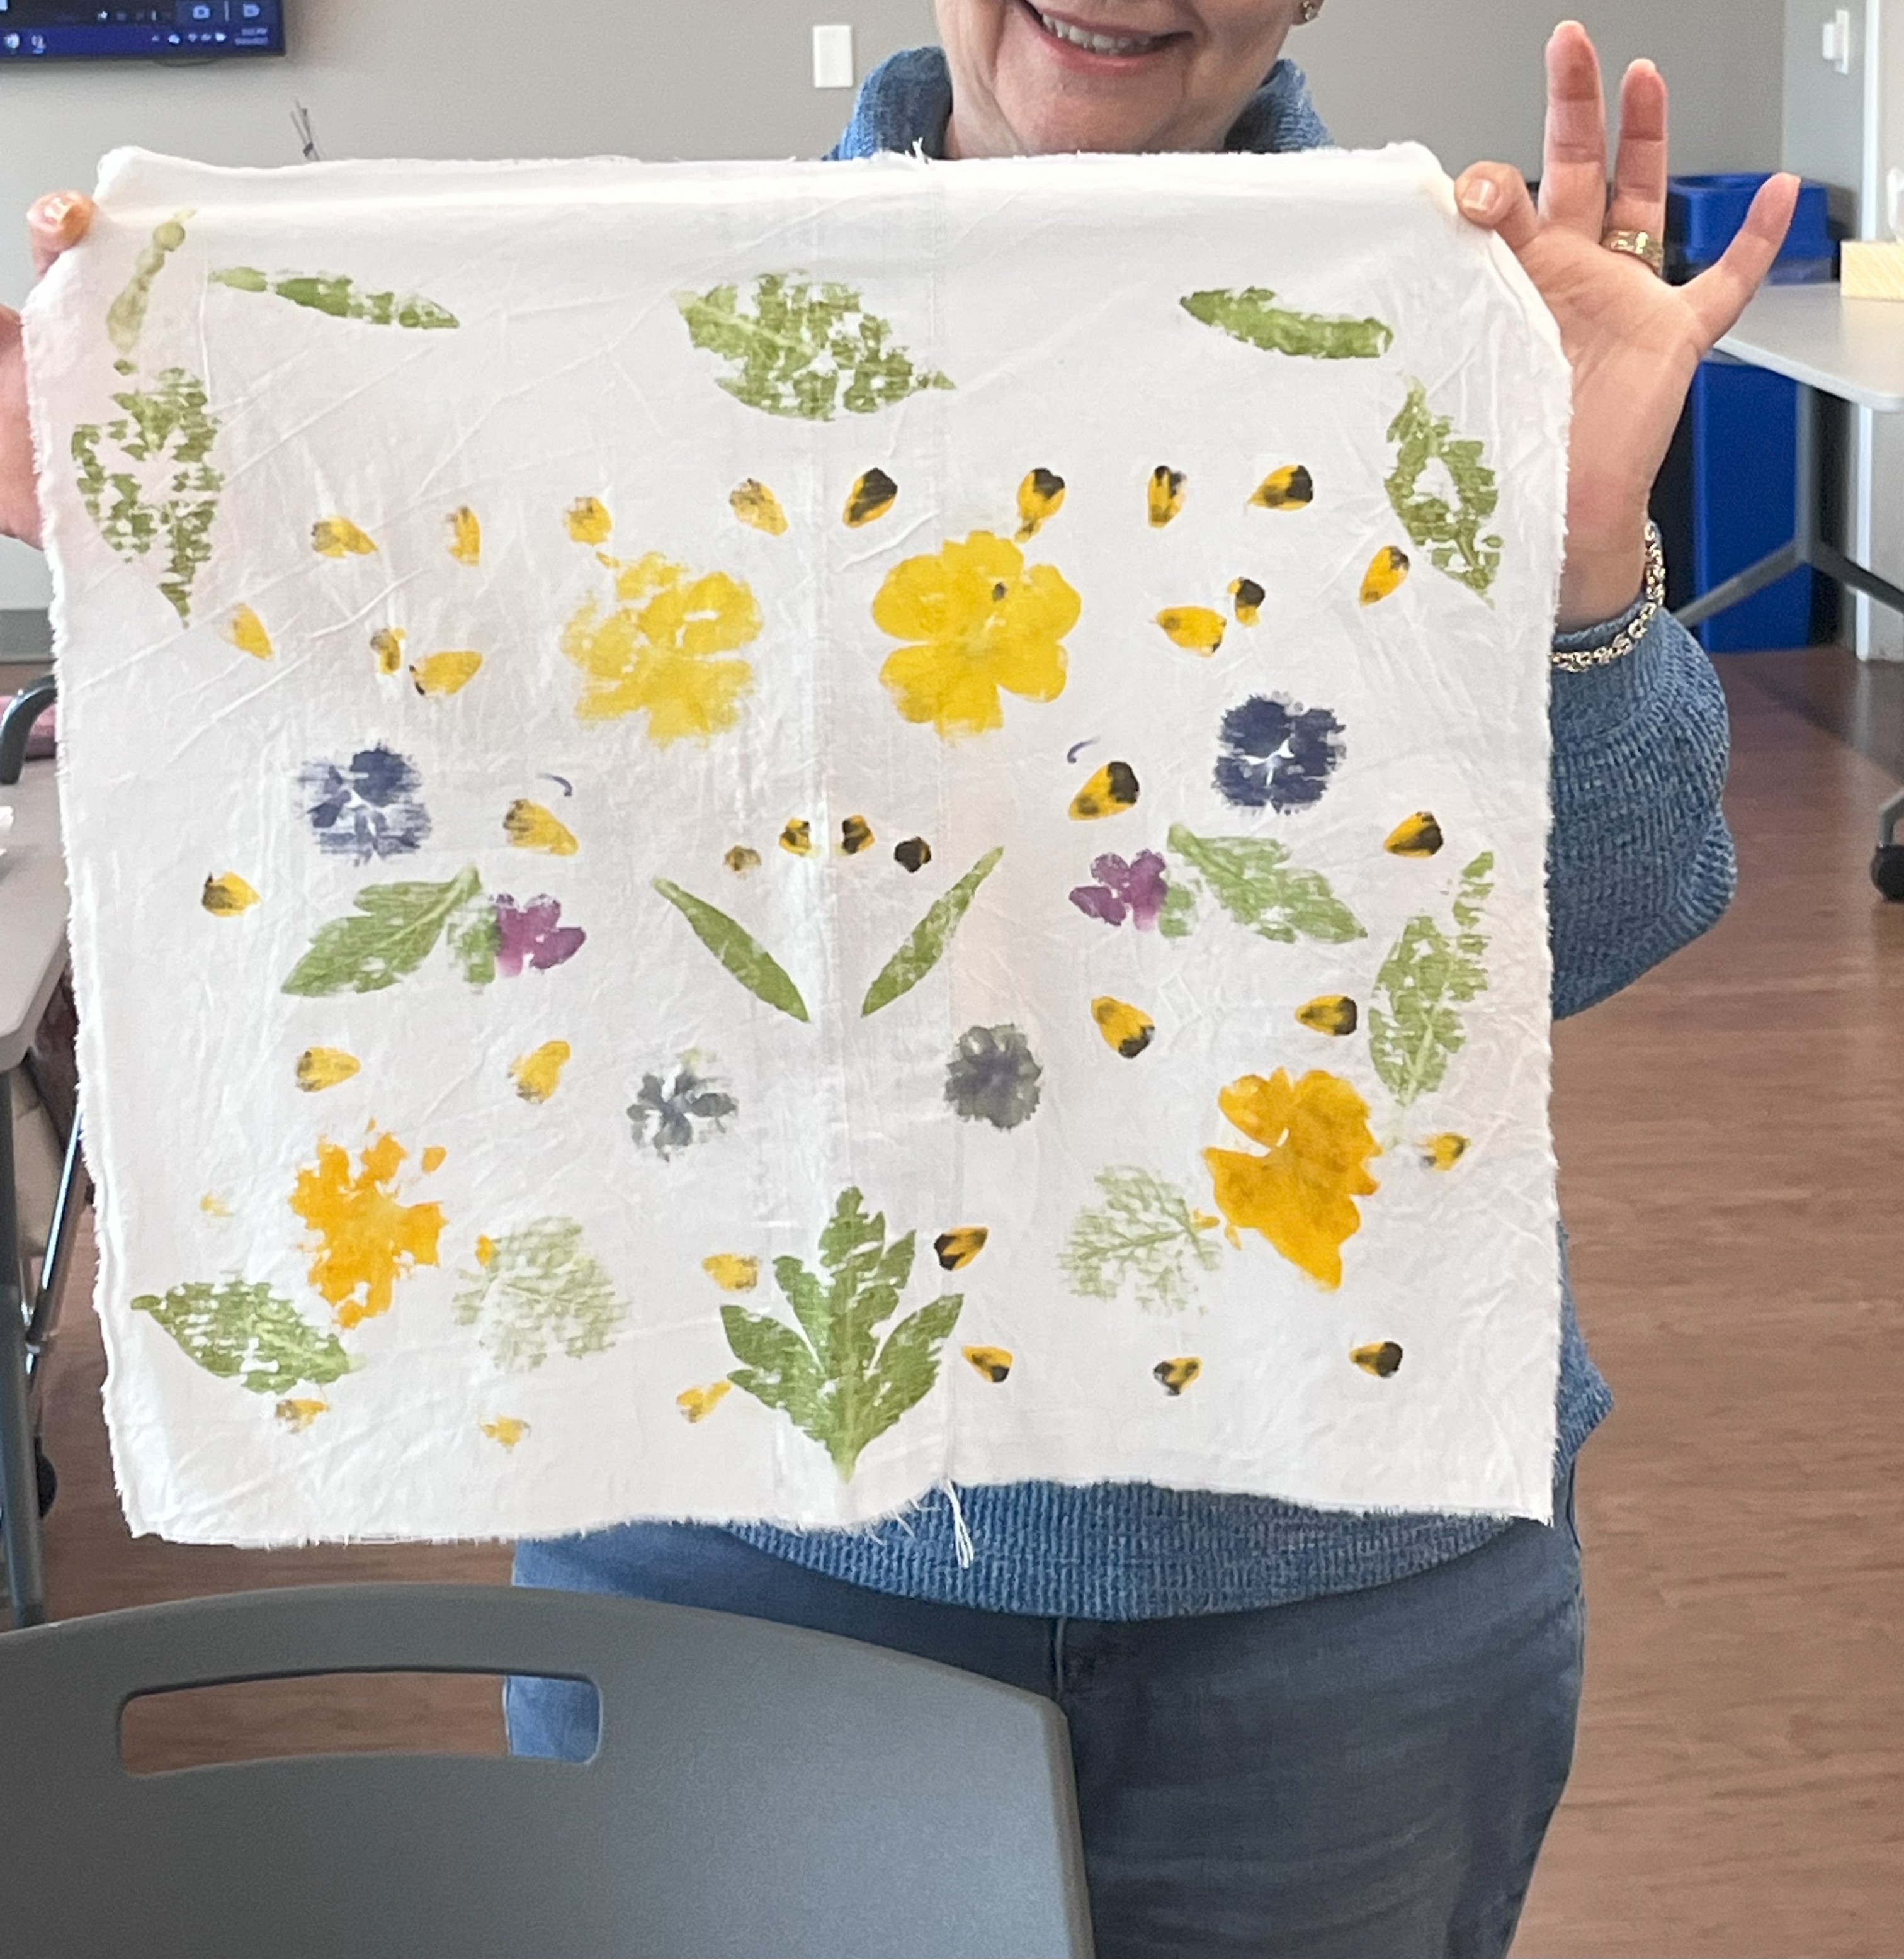
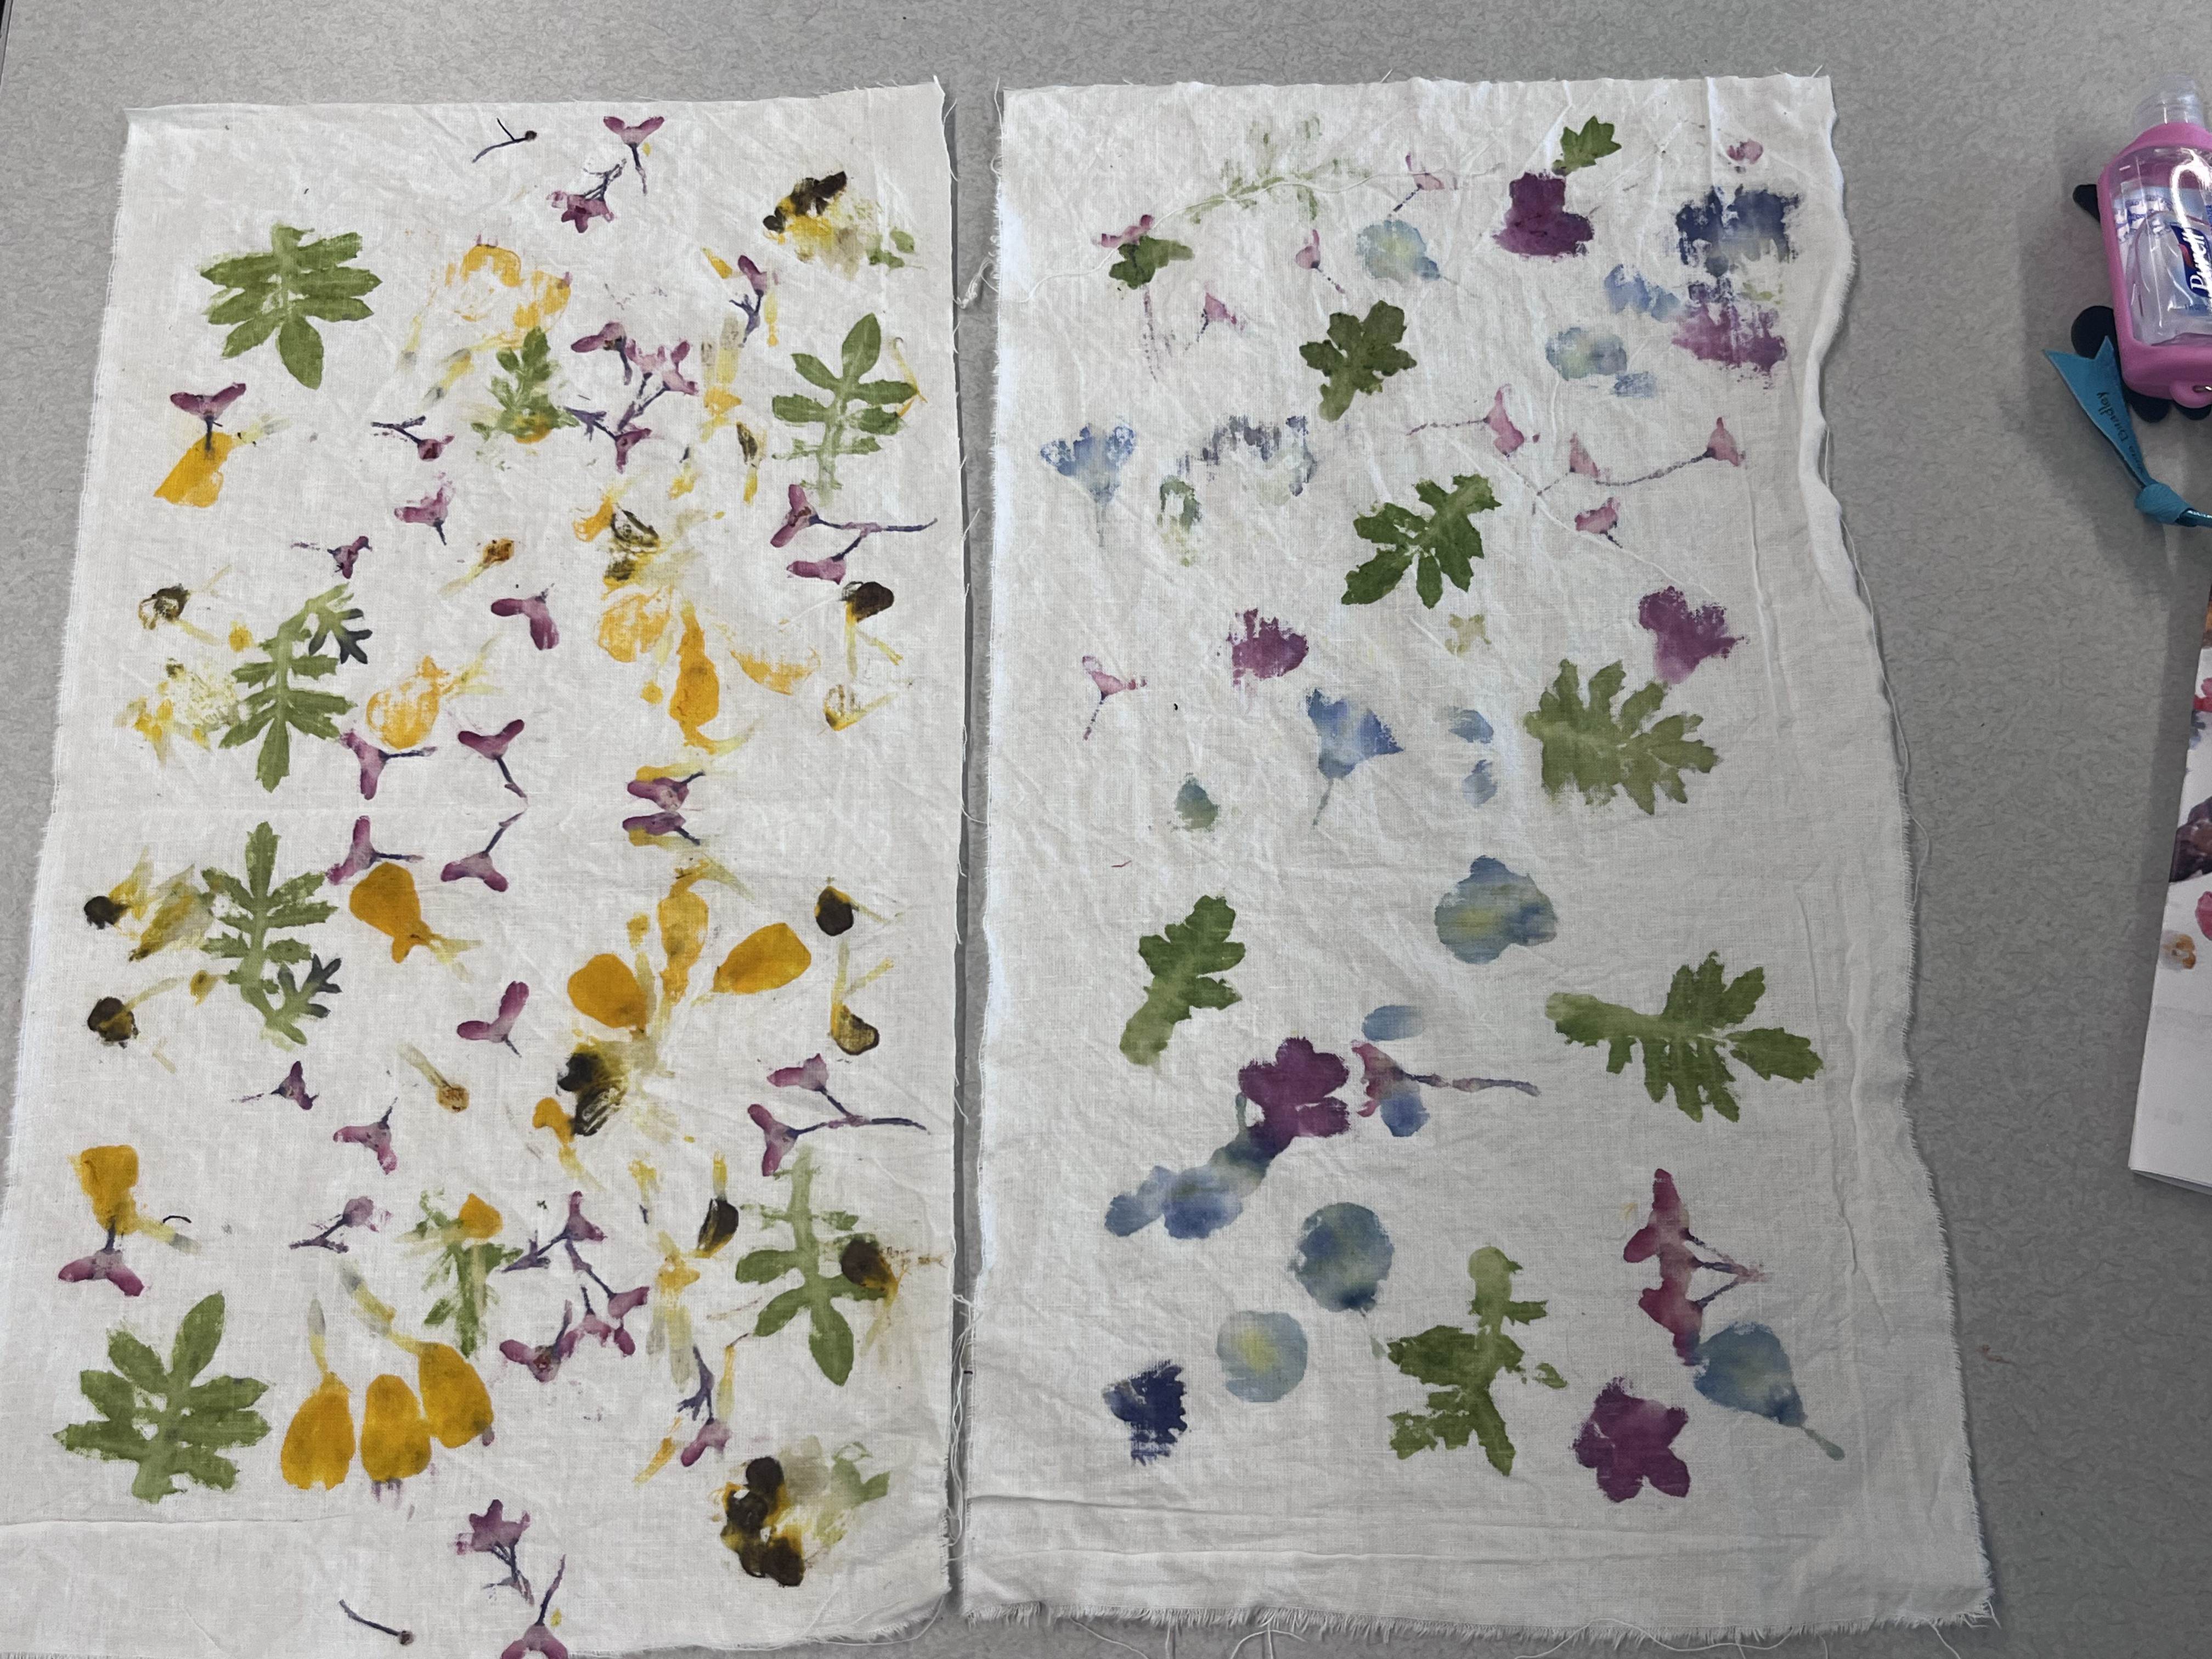
Participants learned the unique art of "flower pounding," a technique that uses a small hammer and natural pigments from flowers and leaves to create colorful, abstract designs on fabric. This eco-friendly and creative process was a fun way to "hammer out" feelings, connect with nature, and craft something beautiful.
Advanced Planning
Our Fiber Arts group meets weekly to socialize and work on their individual projects. Once a month, we present a special program to teach a new technique to the group. We usually start planning two to three months in advance in order to promote the program on our calendar and gather supplies. I learned about Hammer Dyeing or Flower Pounding at a workshop last summer. It's pretty simple and very gratifying!
I purchased inexpensive flour sack towels, and adult services librarian Mariann Kmetz tore them into four pieces. The fabric needed to be "mordanted" with alum in advance for the colors to attach well to it. Flowers and foliage were foraged from Suzanne's yard. We also purchased a flat of mixed flowers from a local nursery. The hammers were part of our program supplies, and they were also used for tin punching with our DIY group.
Preparing the fabric:
- Wash the fabric in cold water without detergent or fabric softener.
- Immerse the fabric to cover it completely in a 16:1 ratio of warm water to Alum Powder (we ordered from Amazon). Alum is a natural mordant that binds the pigment to the fabric.
- Let soak for at least 2 hours and up to 24 hours.
- Rinse thoroughly in cold water to remove any alum residue.
- Hang to dry or use a dryer at low heat.
Marketing
We promoted the program on our monthly calendar, on our website, through social media and through word of mouth among our patrons.
Budgeting
The cost was minimal. We purchased four 36 " x 36" 100% cotton flour sack towels at 69 cents each and cut them into four smaller towels.
Many of the flowers were foraged, however just to make sure we had a nice variety, we purchased a flat of mixed flowers for $22.
Wax paper was used on top of the flowers at a cost of $3.
We had a set of 20 small hammers that were used for a previous program. If you don't already have them, they were $25 on Amazon.
Day-of-event Activity
Room set up: One hour prior to the start of the program. One person to set up.
All the flowers were set up on a counter in the room.
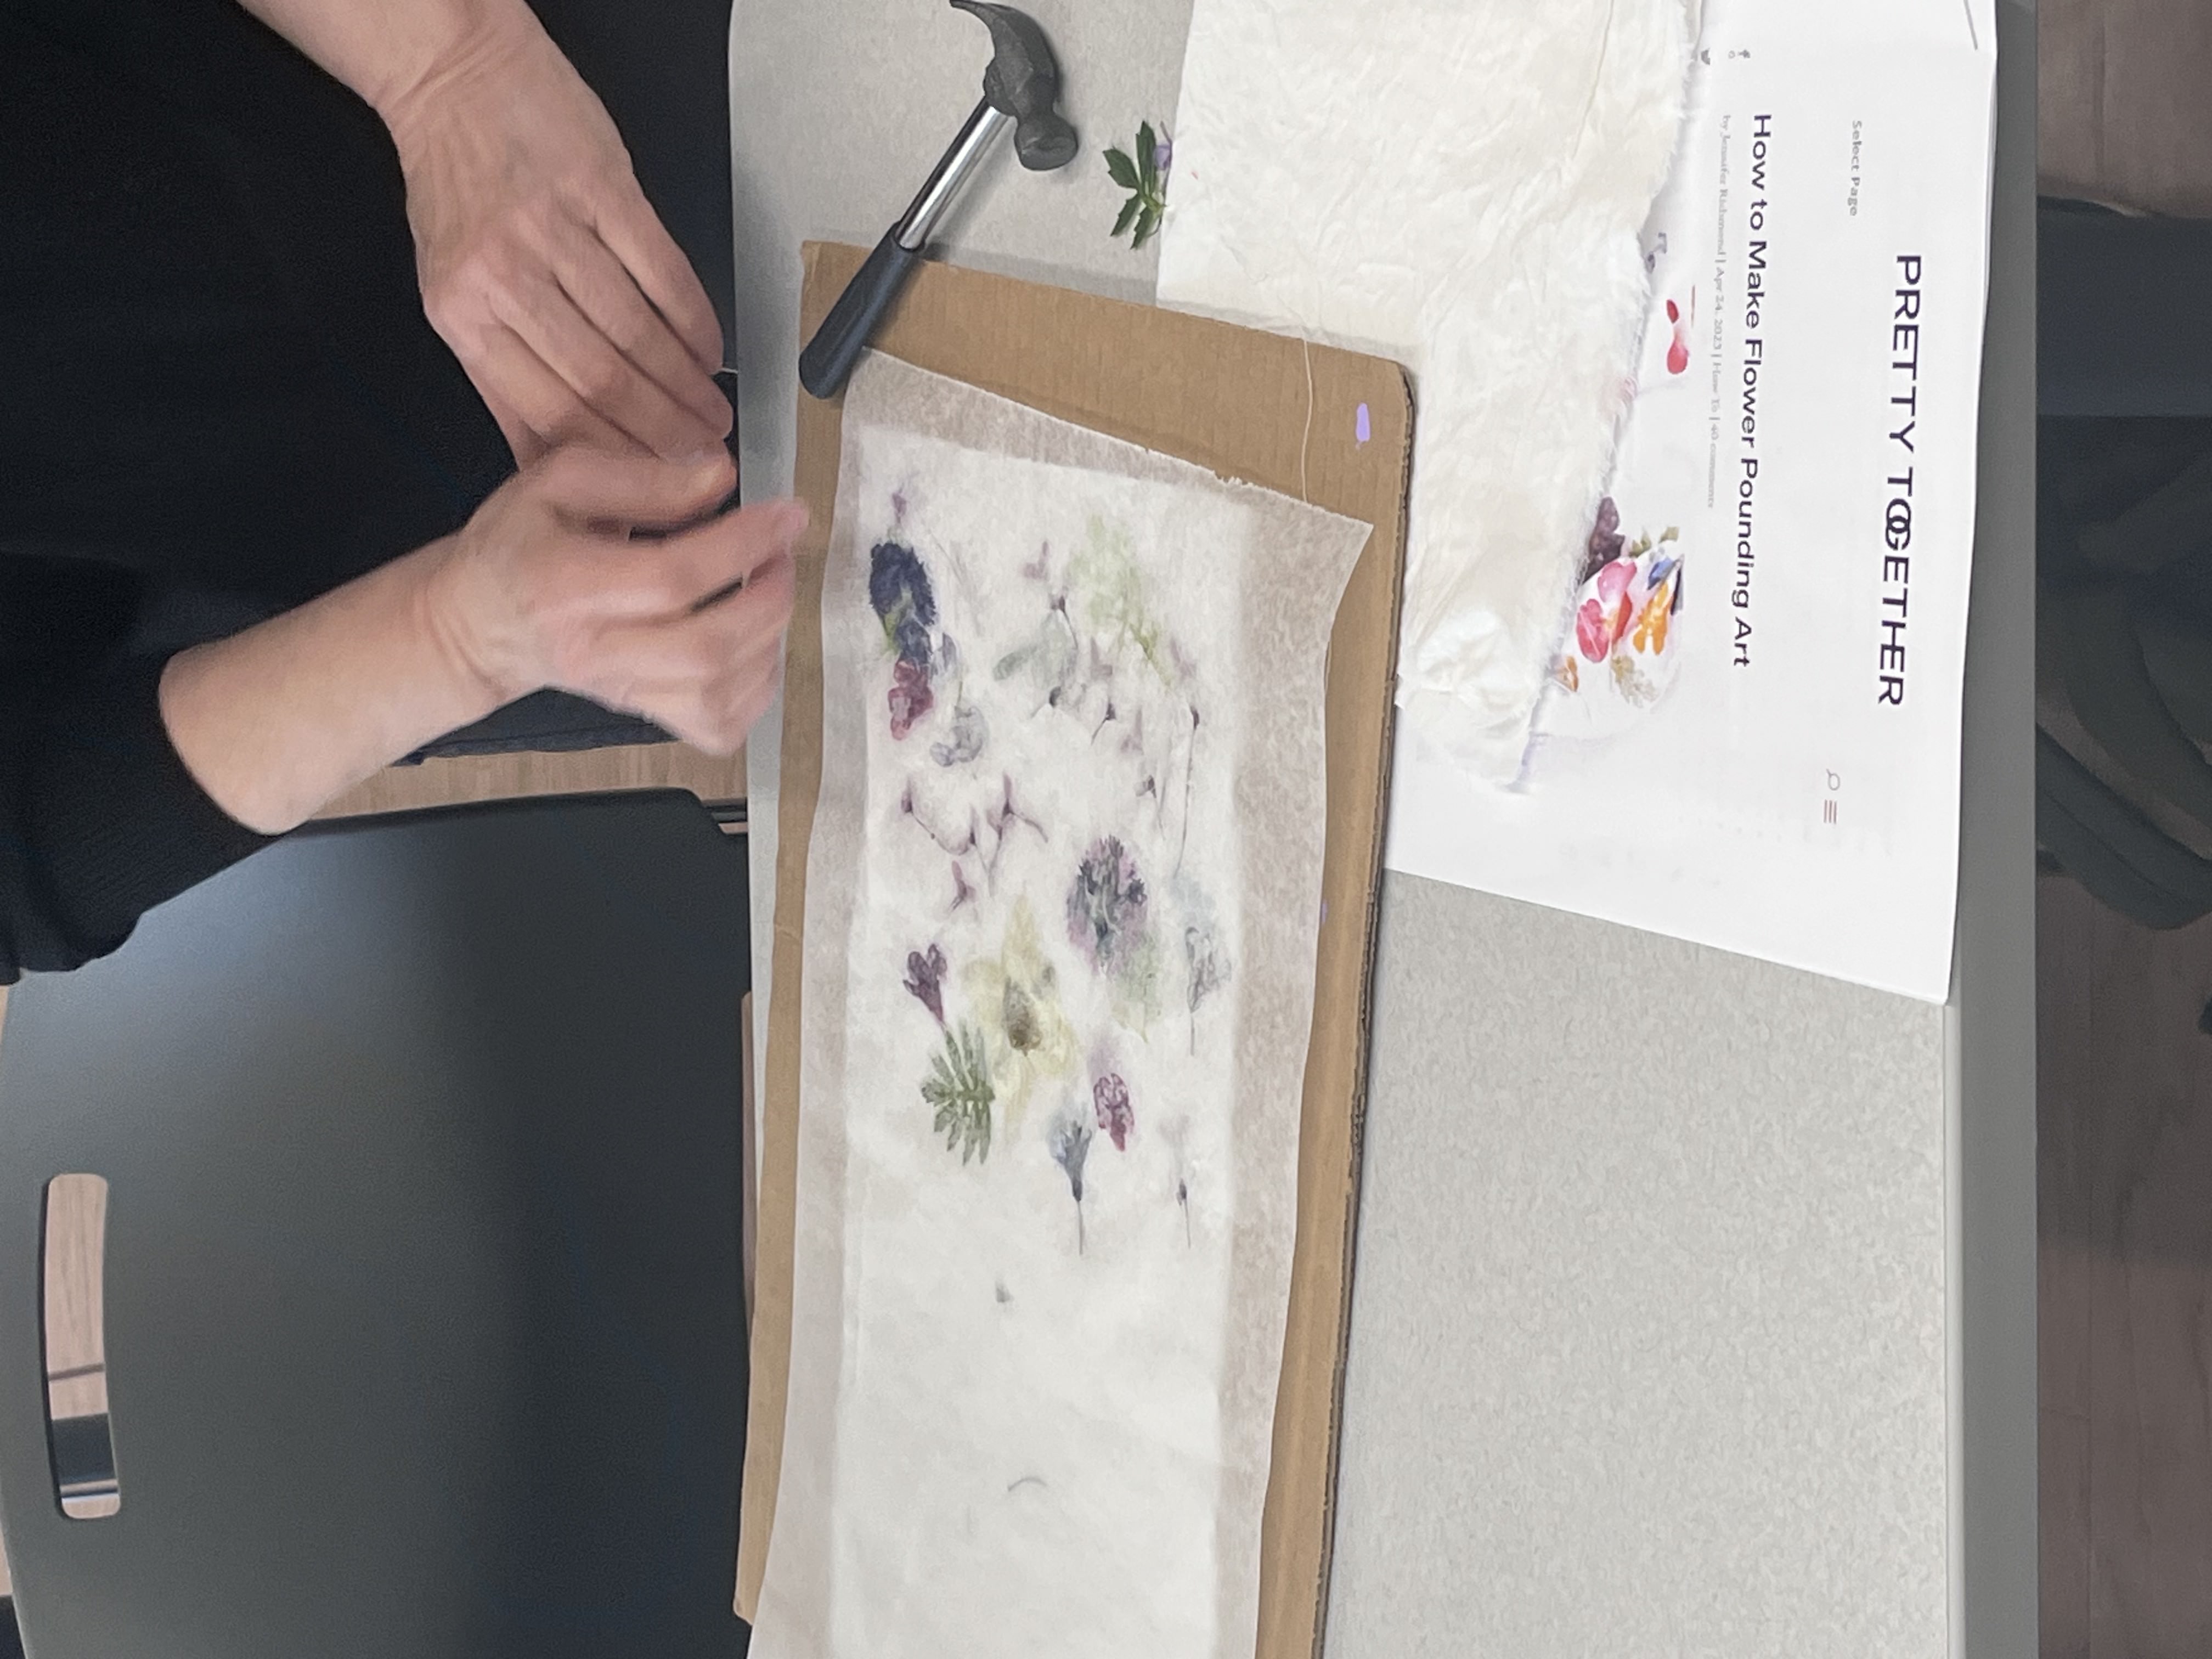
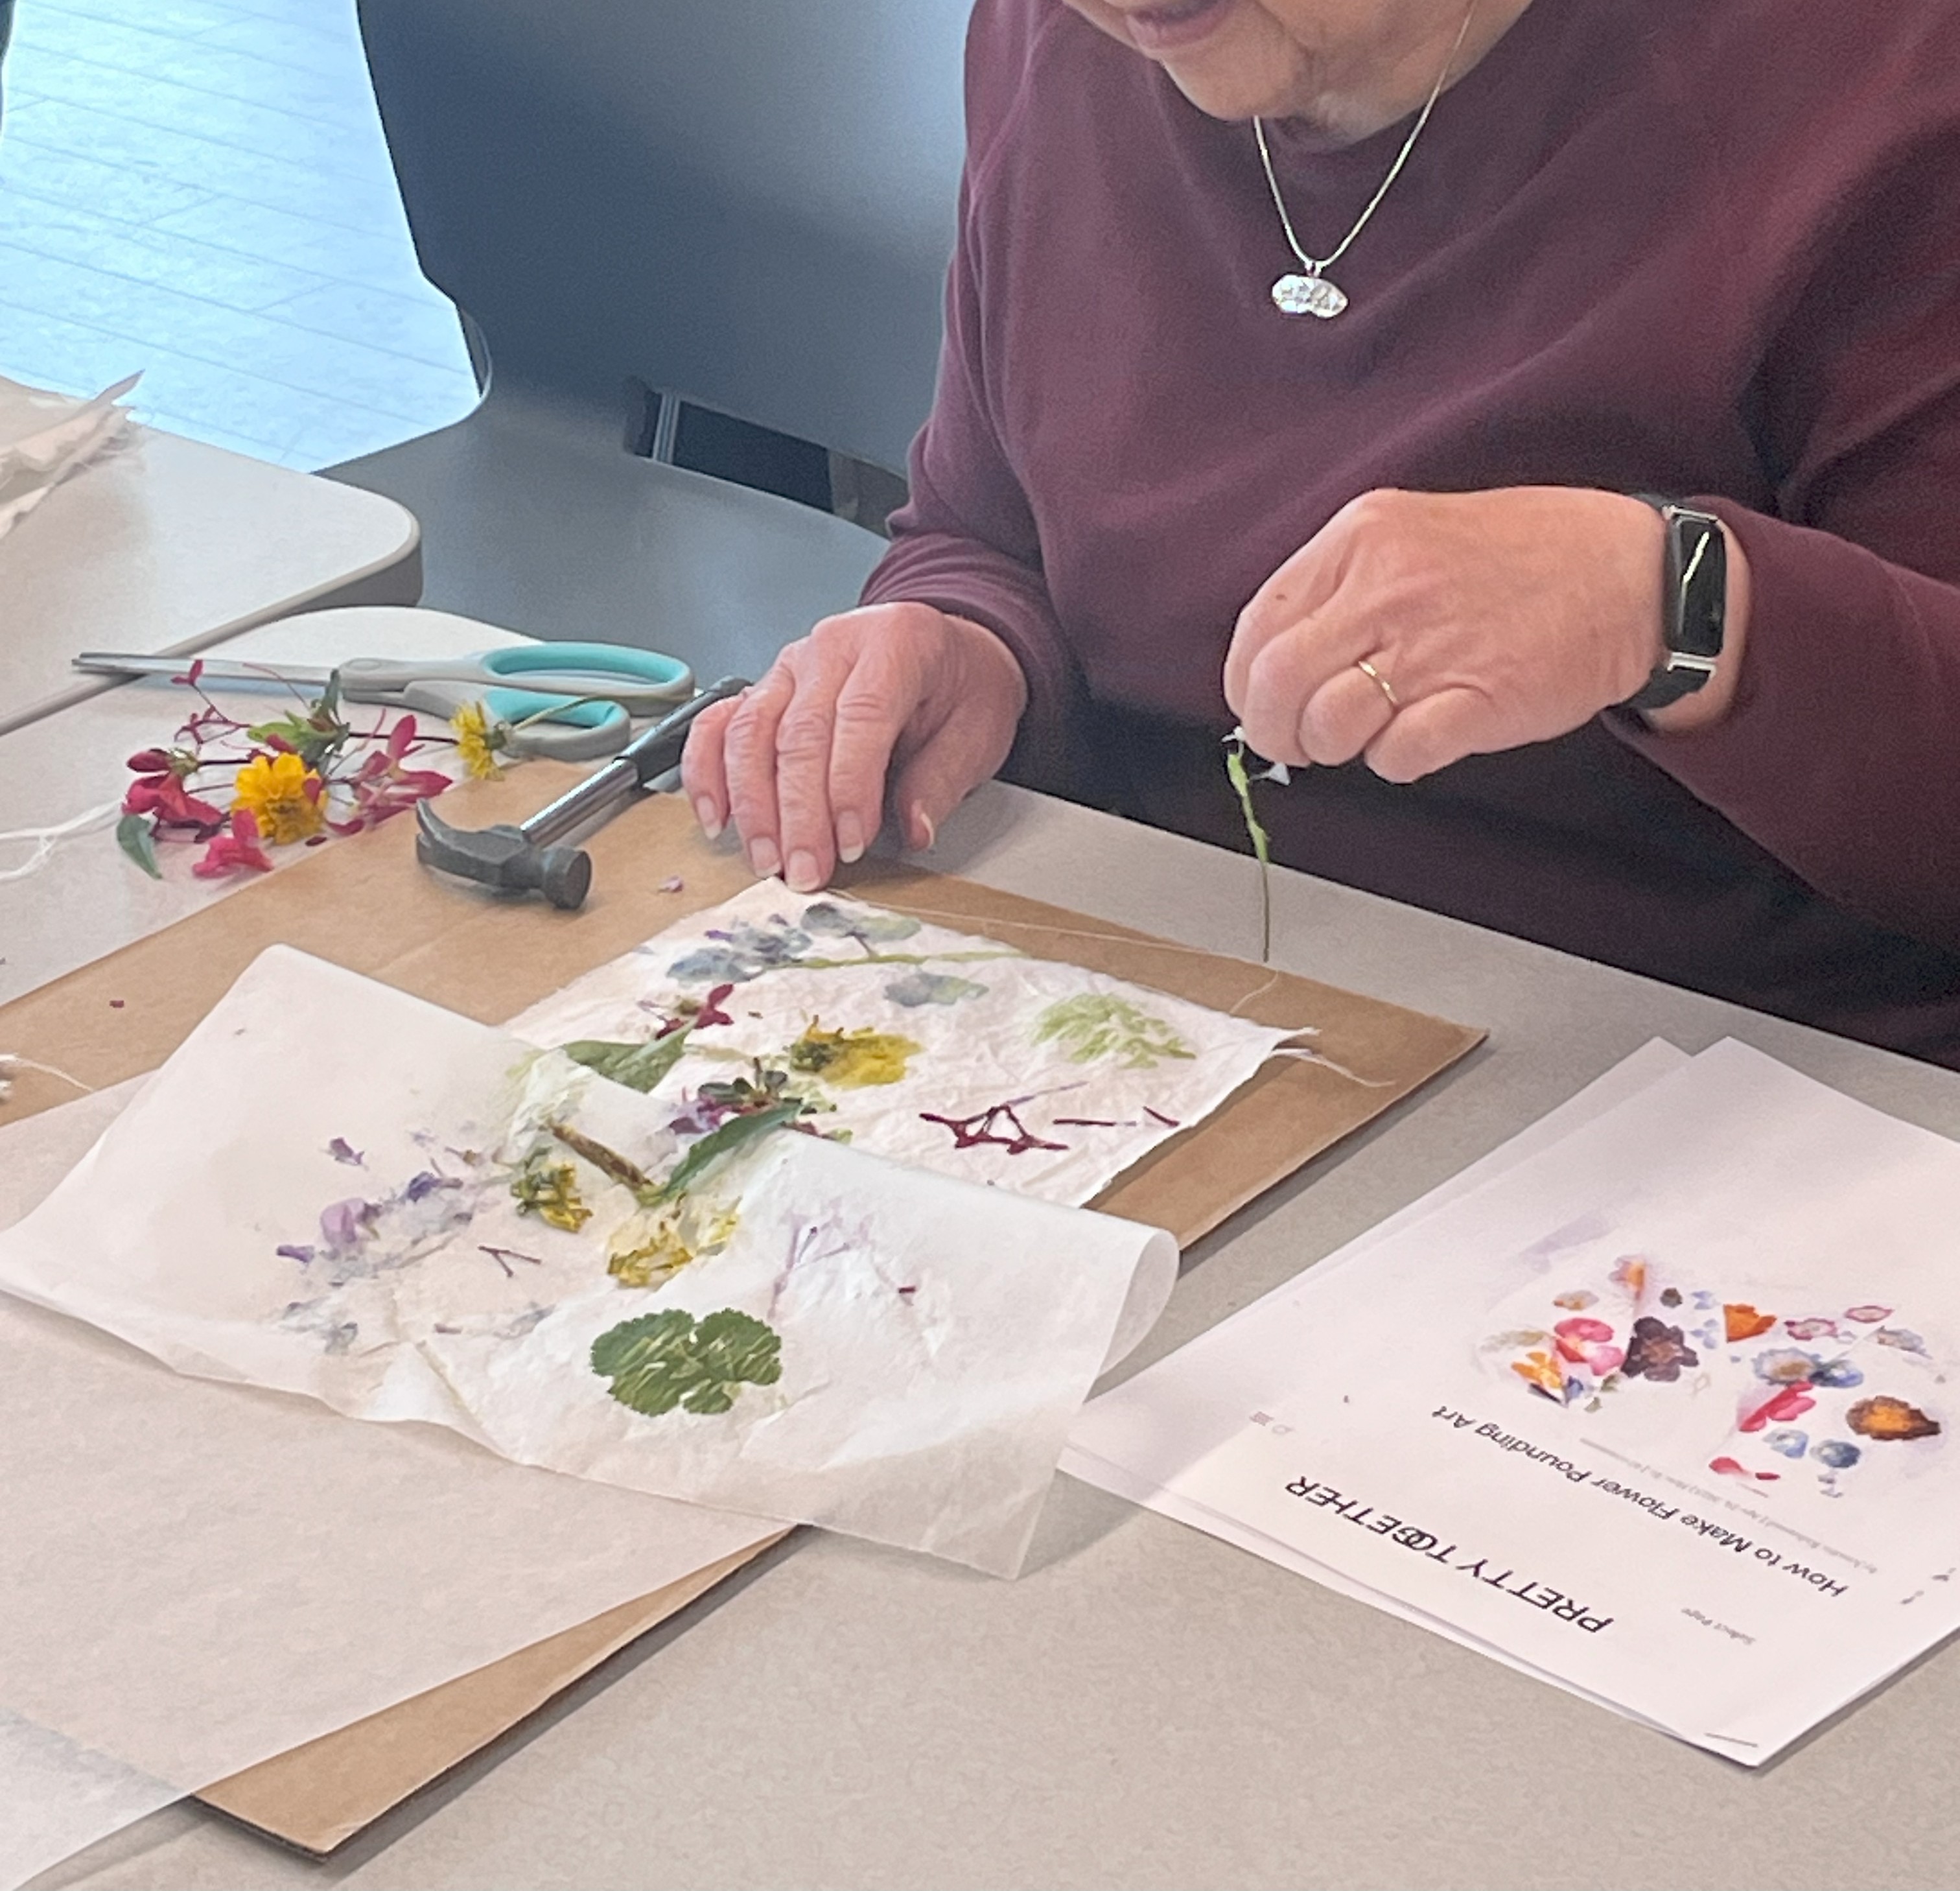
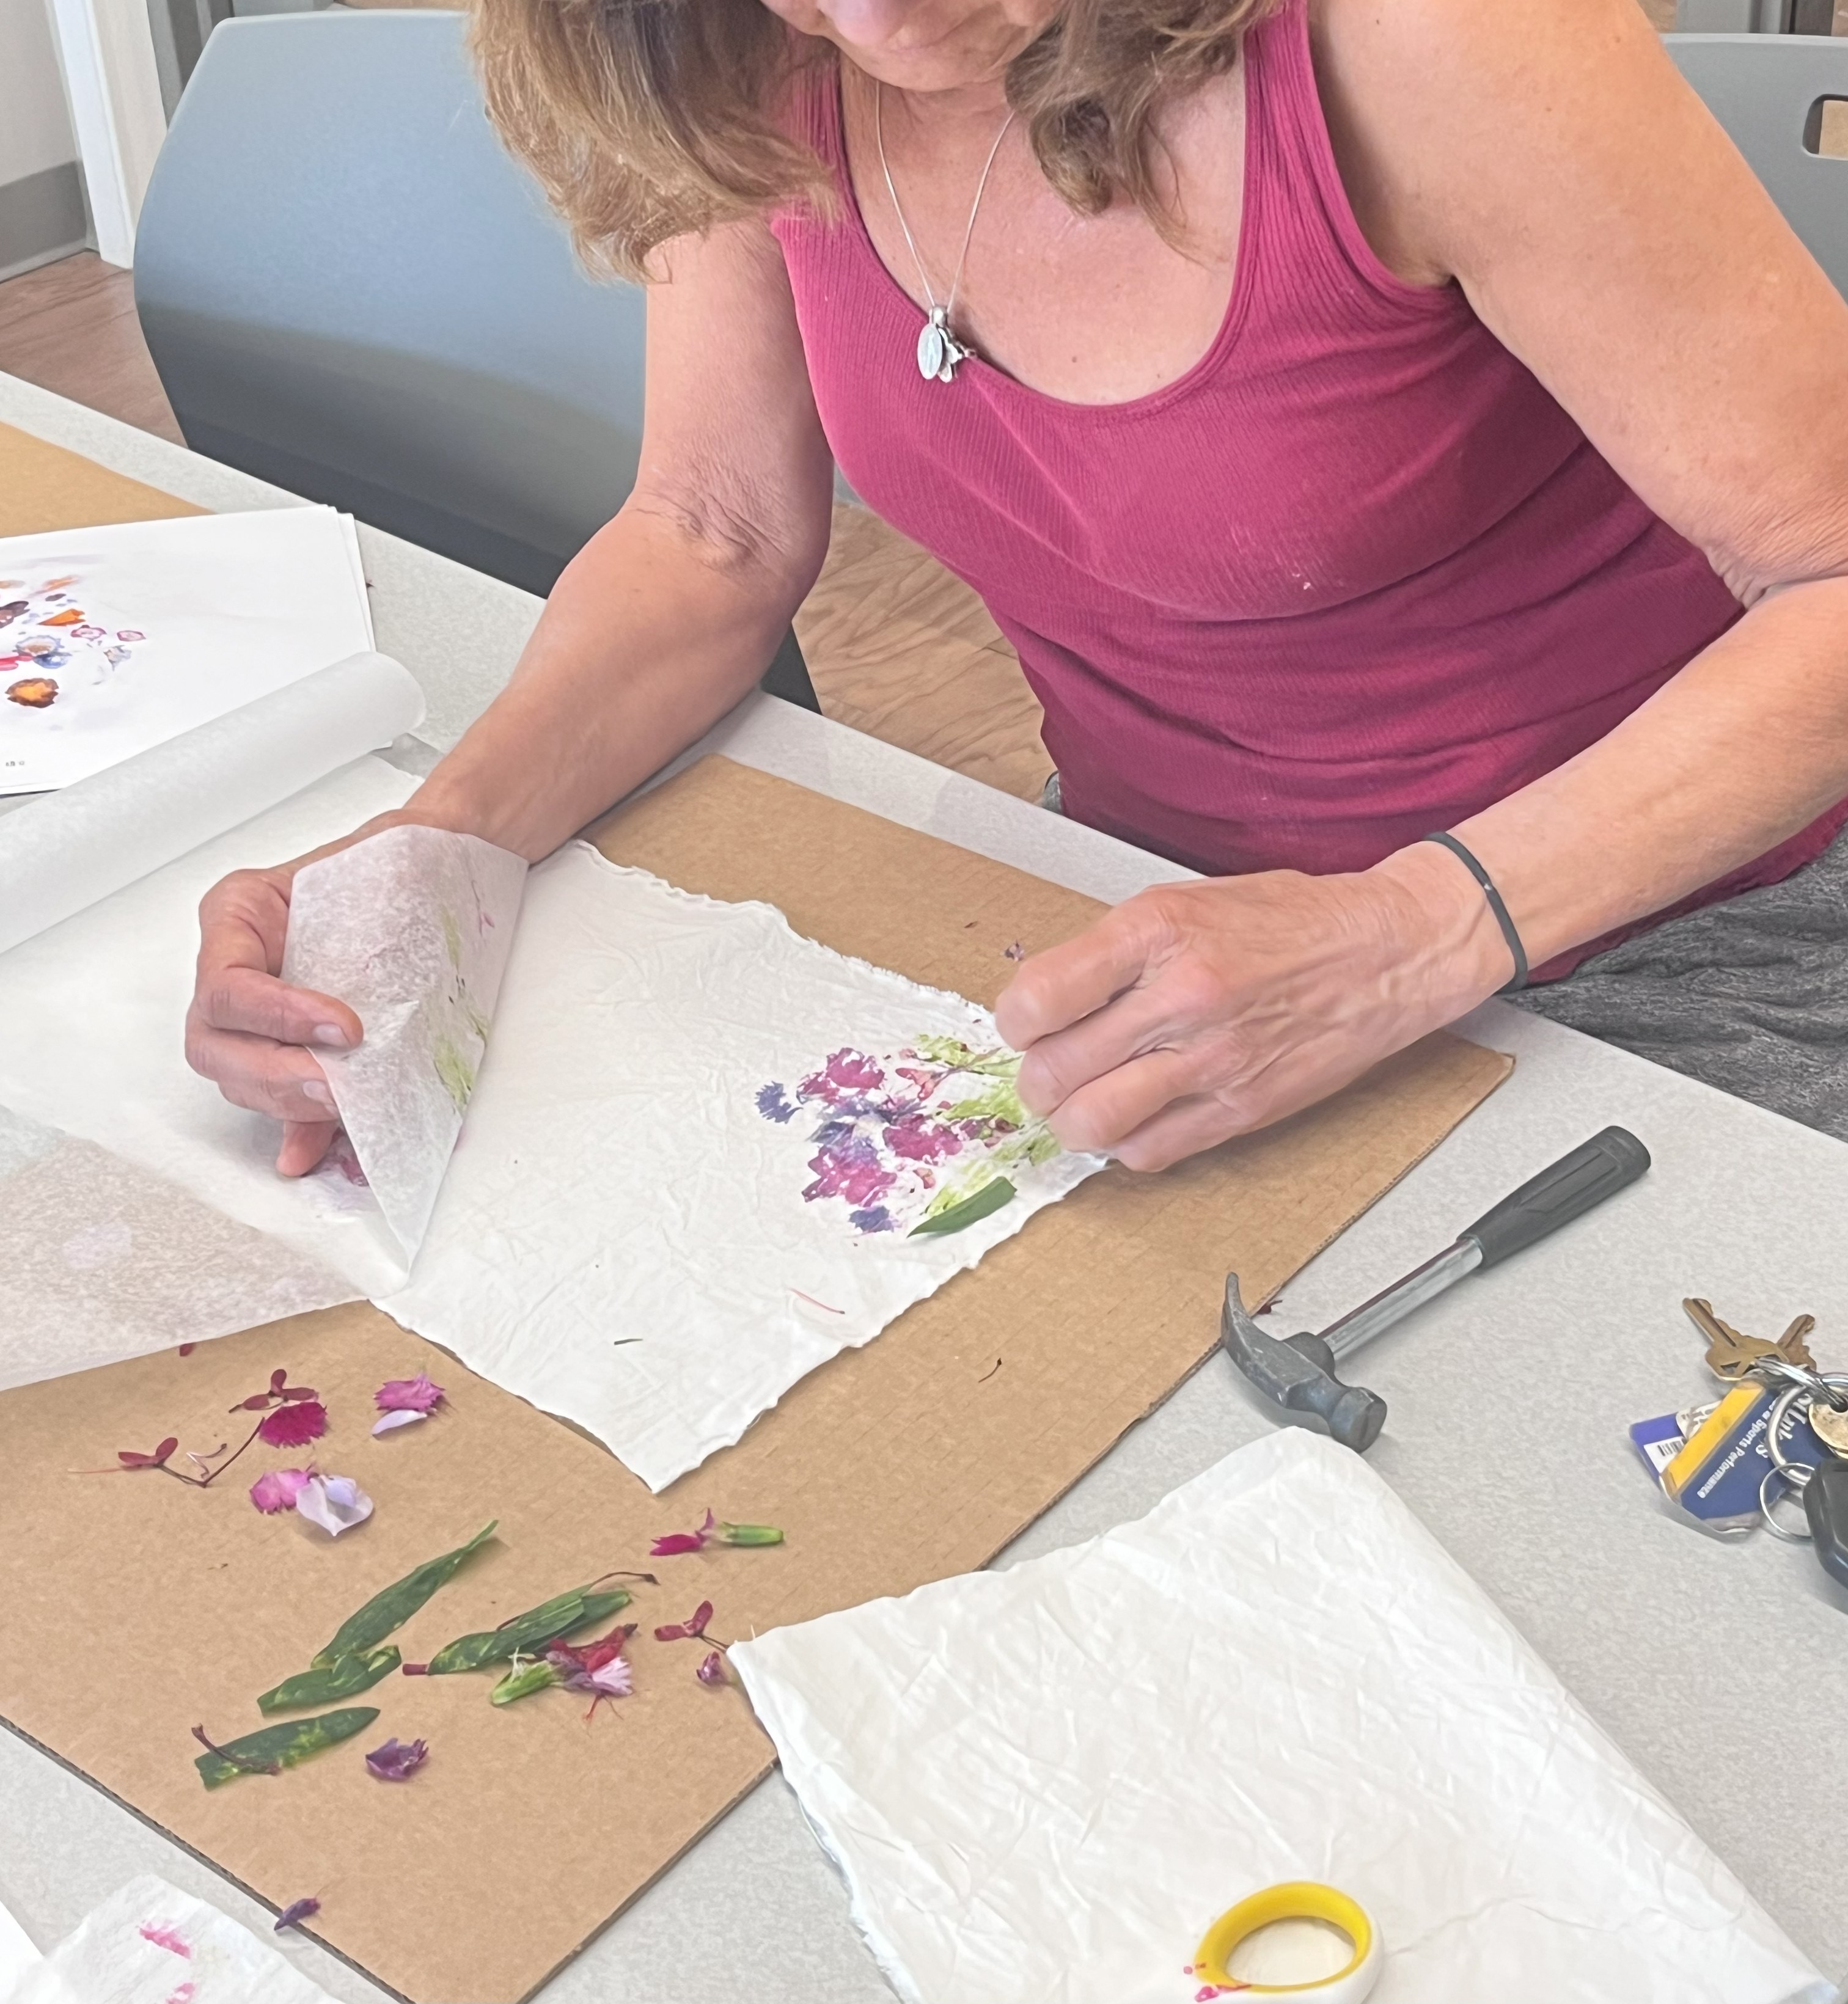
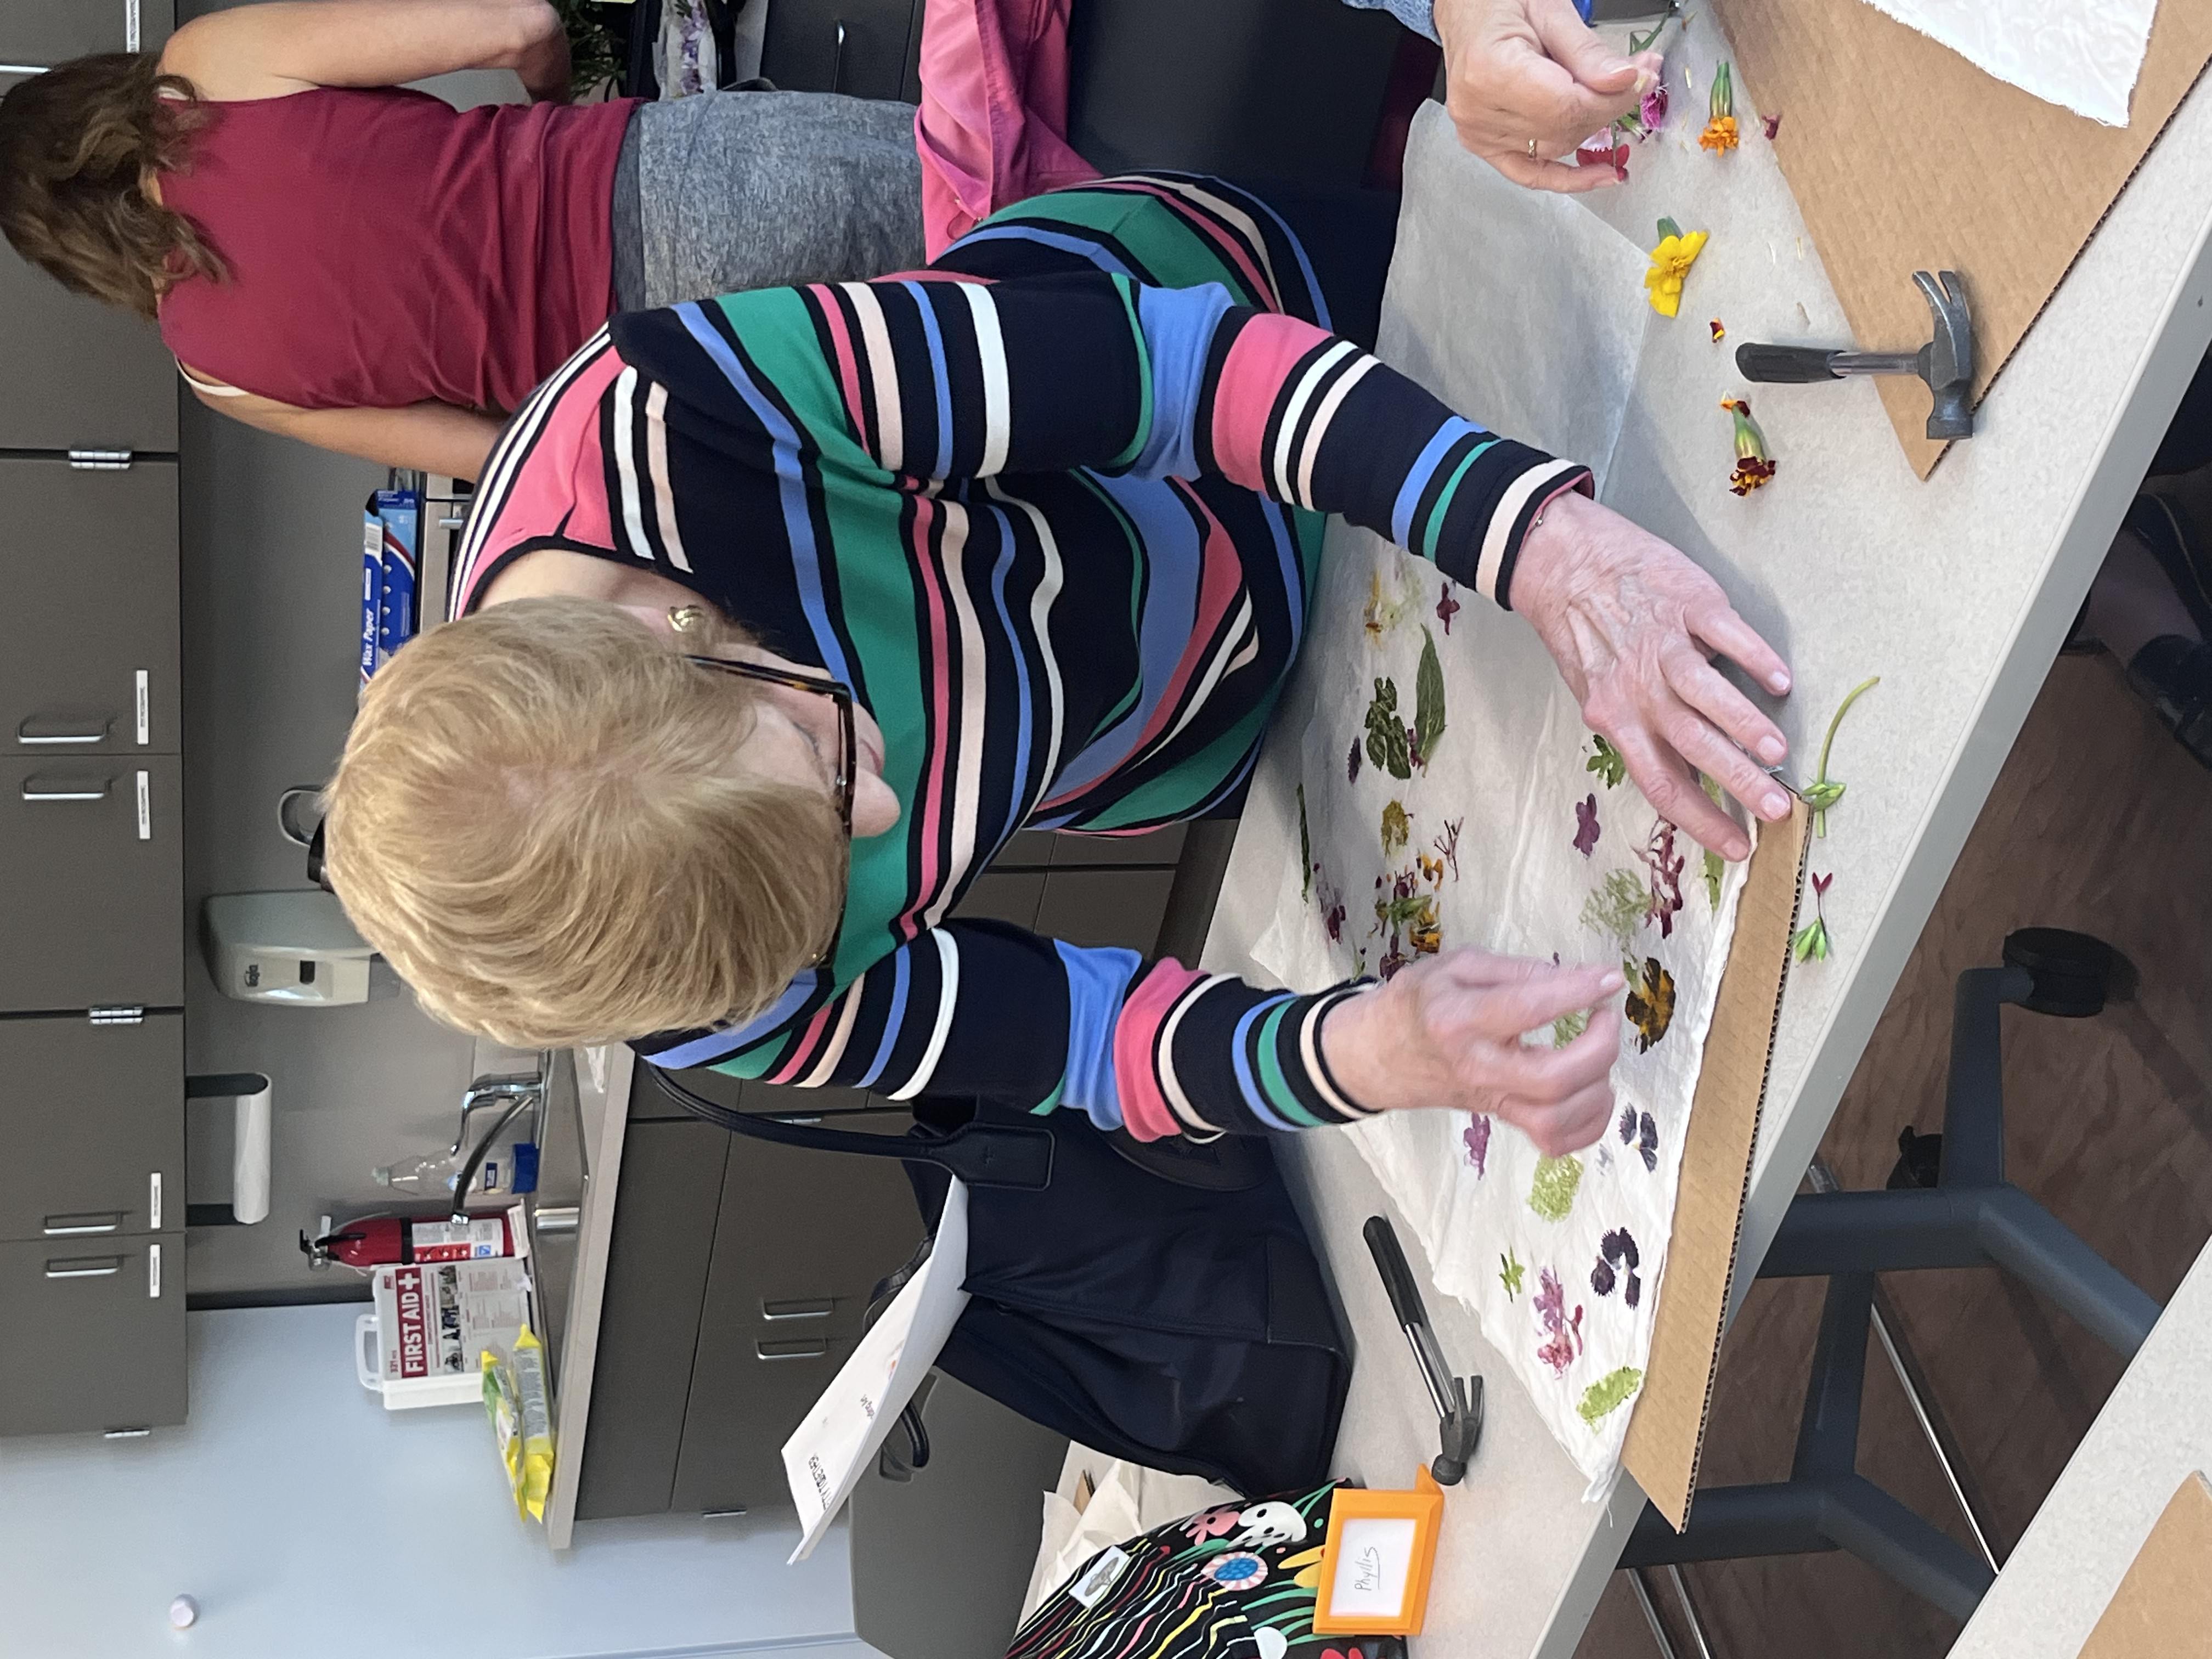
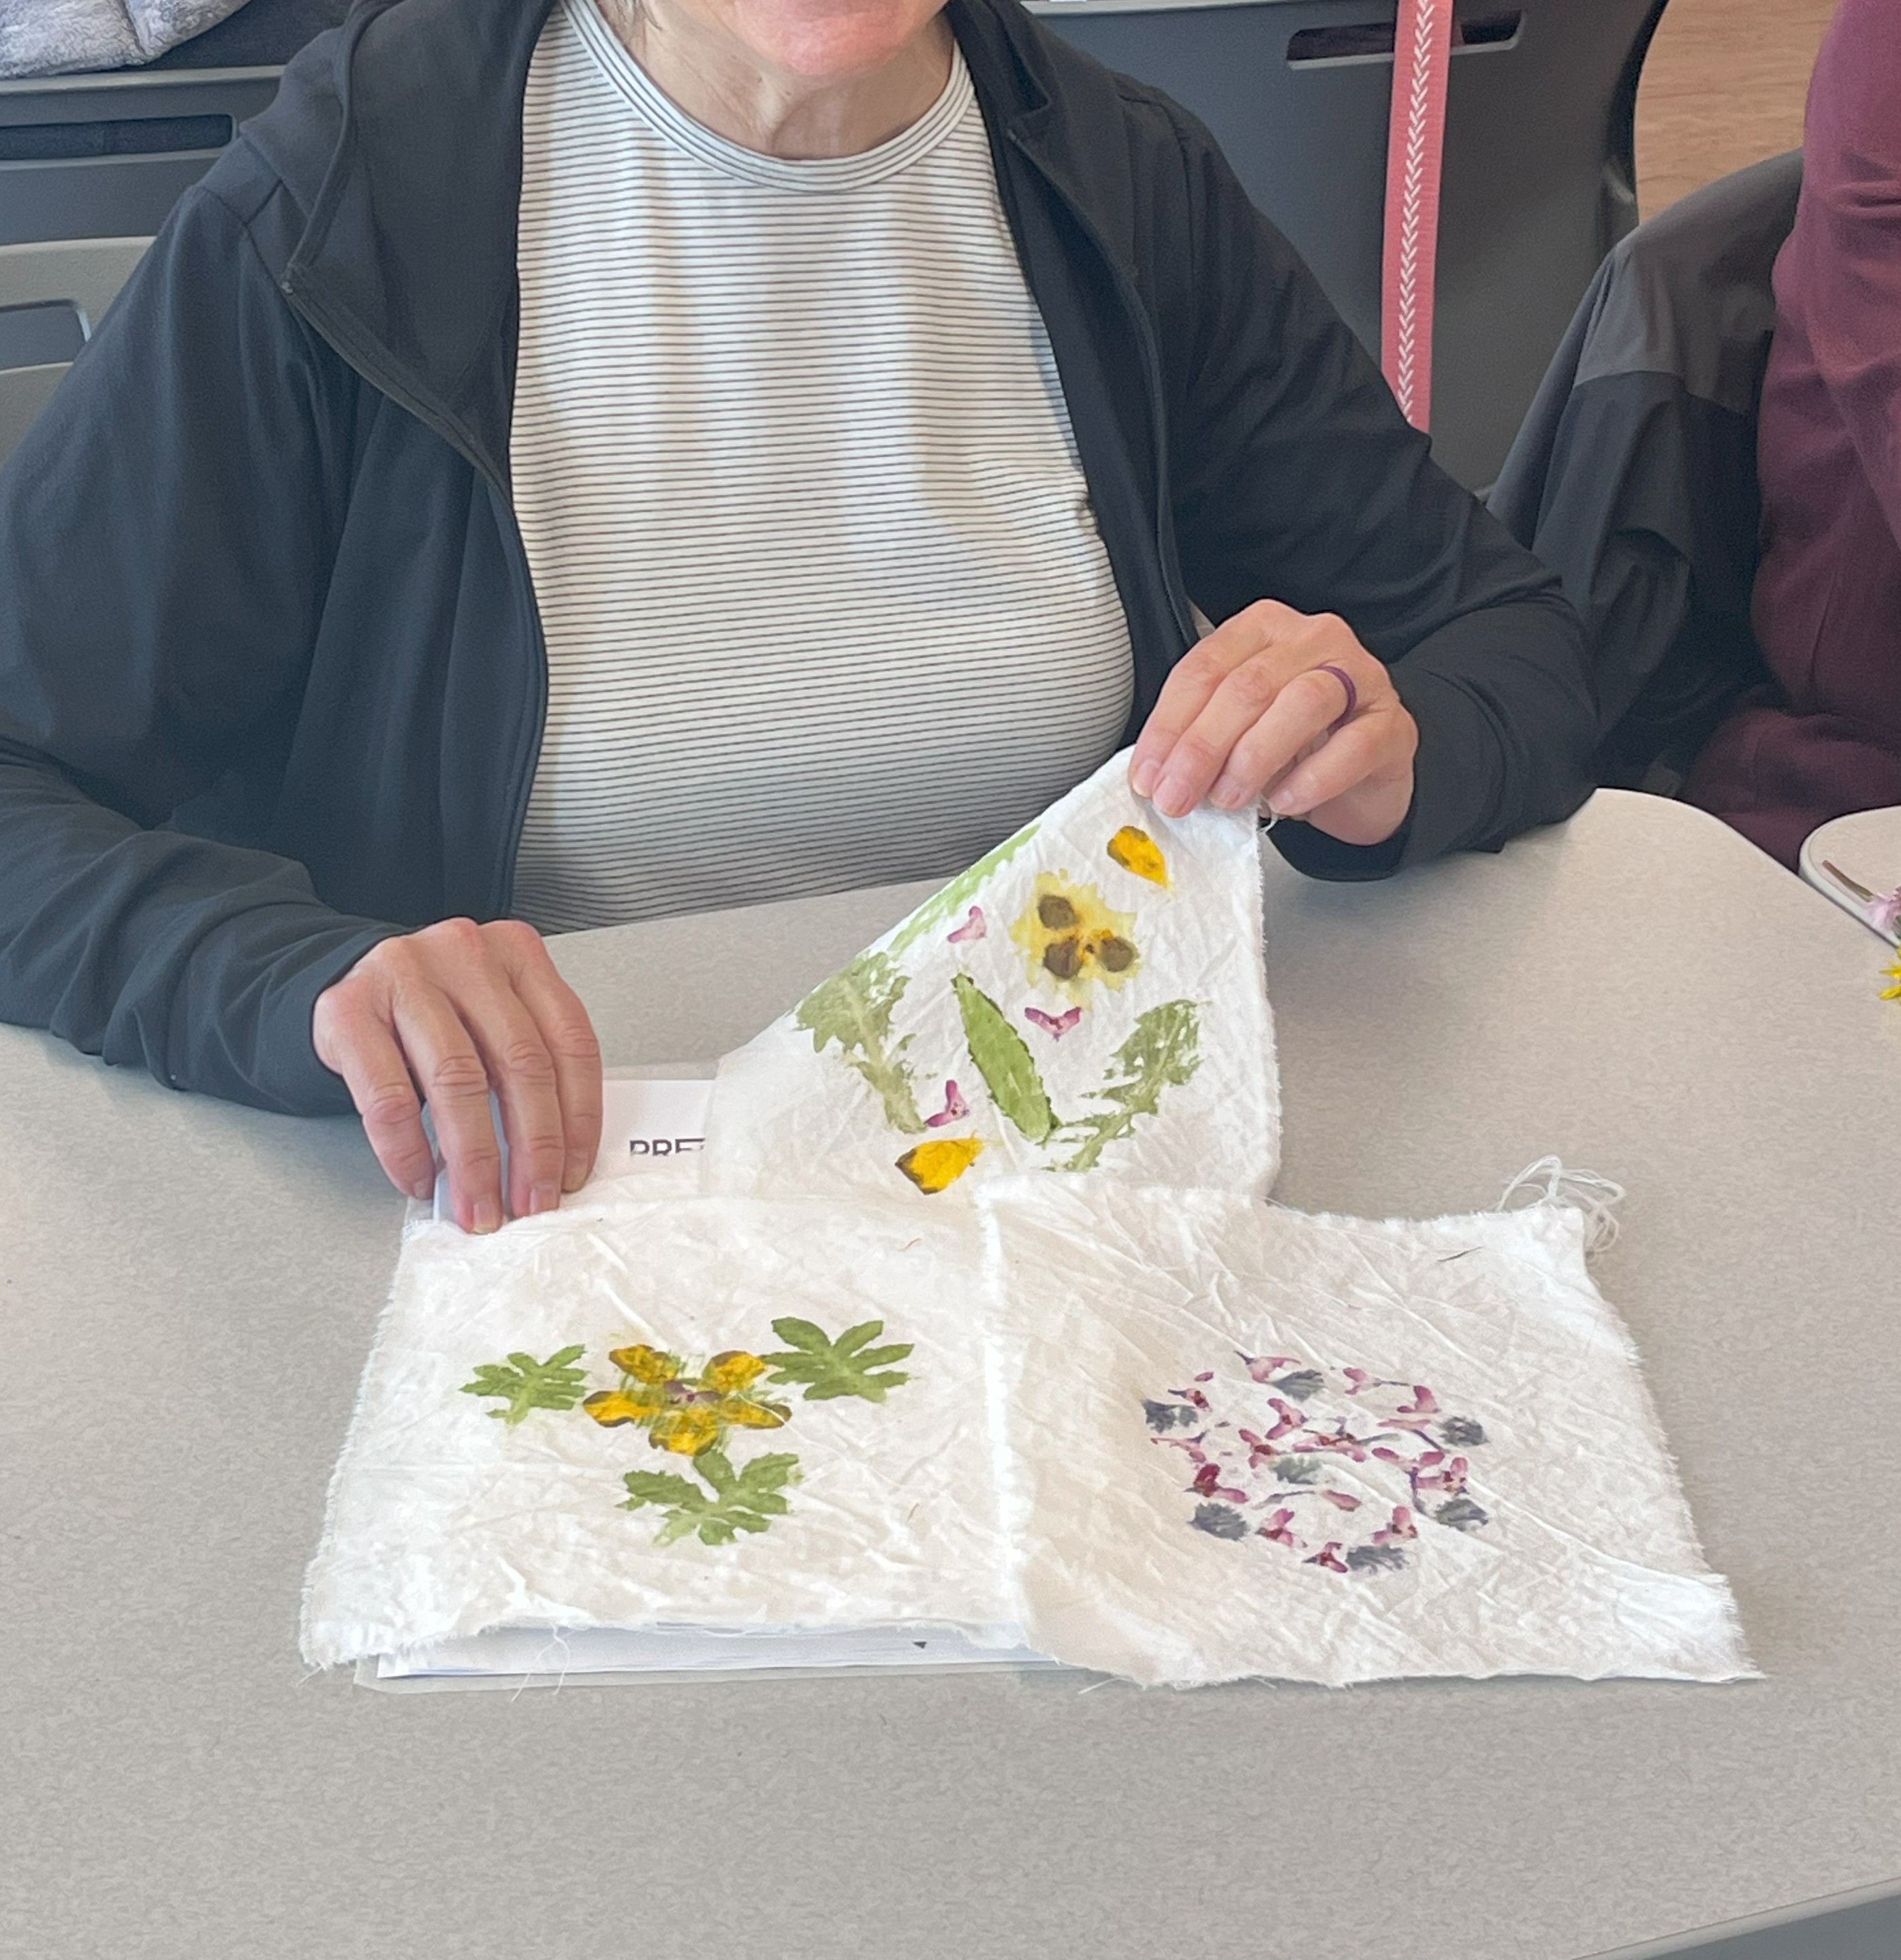
Each participant's place was set with a sheet of corrugated cardboard to protect the table, a small hammer, a sheet of wax paper and a blank white cotton towel. Also included were instructions on how to prepare the fabric if they wish to do this again at home.
Work on a safe surface (we used corrugated cardboard) on a table.
- First, lay the fabric down.
- Choose a variety of flowers.
- Cut the stems off as close to the base of each flower as possible for it to lie flat.
- Place wax paper on top and start hammering from the outside of the flower and into the center. You will get comfortable with the proper amount of pressure needed as you progress.
- Once all of the pigment is transferred to the fabric, remove the wax paper and peel the excess flower petals off the fabric.
One participant suggested stitching around the pigment to add another dimension to her work. This can also be done on watercolor paper.
Program Execution
The program started by showing samples of completed work, followed by a description of how the fabric was prepared in advance and finally a brief demonstration of the process.
There were 13 creative fiber artists in attendance. Everyone enjoyed the process and enjoyed showing off their designs and admiring others' designs.
Some participants remarked that they planned to do this with their grandchildren, and some asked, "When can we do this again?"
Advice
The program was noisy! Our program room is behind two sets of doors, away from the main area of the library, so sound was not an issue. I would suggest that you take the noise factor into consideration when planning this program.
Supporting Materials
Slideshow Images
More Programs
Plant Propagation Workshop
Audiences:
Make an Herbal Heating Pad
Audiences: