Participants create a mini seed-starting greenhouse out of a clean plastic container like a milk jug, soda bottle, or clamshell package that they can put outside in late winter for a spring germination. Seeds in the greenhouse start earlier, grow stronger, and are better adapted to the local microclimate. The project has one tricky cut with scissors but is otherwise suitable for all ages and abilities and can be a fun activity for families and friends working together. You can host a discussion with local gardeners, give a mini-presentation on how plants grow, or just enjoy the time accomplishing the project with your patrons. Participants take home their project to grow in their own outdoor space.
Advanced Planning
This program happens in mid-to-late winter, which in Anchorage is ideally the end of January and the first few weeks of February. The completed projects should spend several weeks frozen before spring, so check your weather forecast.
There are two tricky things about this timing:
- Most stores don't carry potting soil this time of year, so you have to buy it far in advance. I run a different seed-planting program in spring or summer, and I overbuy the potting soil to save for later. It keeps fine if it's dry!
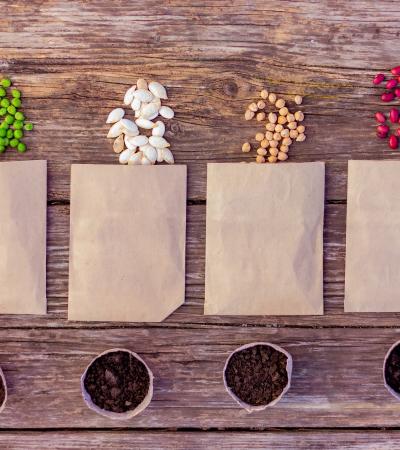
- Seeds are also not in stores this time of year, so you have to plan ahead in the summer. Pick seeds that you know will have a high rate of germination. Bulk wildflower mixes designed for your area are ideal. In Anchorage, our easiest crops are violas, kale, breadseed poppies, dragon tail radishes, spinach, mustard greens and chives. Something that can grow with little care and be successful without transplant is ideal, so have at least one easy, foolproof flower option.
- If you have many choices, kids tend to pick based on the picture on the packet. To reinforce reading the information before choosing a seed, repackage your seeds in neutral containers.
A lot of people will show up without bringing their own jug or container, so stock up on jugs for a few months before you host this program to make sure that everyone can participate. The jug/container is mission-critical to this project.
Marketing
I posted the listing in our print and online calendar, created a paper flyer and created Facebook events/Facebook posts about it. In 2022, the local news showed up, which helped publicize this further. In 2023, I invited a local preschool to join us. If you have an existing relationship with a community that may enjoy this program (like a preschool or a gardening group), invite them!
This is also a fun activity for families, so try to schedule some of your sessions for the weekend, after school or during school breaks so they can more easily attend.
Budgeting
The costs of this program are all in the duct tape, potting soil and seeds. If you can get any of those things donated, great!
Most milk jugs take about 4-5 cups of soil, so multiply that by the amount of people you think will show up and buy accordingly.
You also need (and probably already have) scissors, permanent markers to label and decorate the jugs, a way to scoop dirt and pour water, and probably a broom, dustpan, etc. for cleanup. I put down a tarp to protect the floor, but honestly, it's overkill. The recycled milk jugs and other containers are essentially free.
I also make a handout about next steps (with a little library promo on it) that I print in-house. It's a half-page summary of what to do with your project plus a link to our website.
Day-of-event Activity
Here's how you build the project: cut a milk jug in half near the bottom of the handle. If you're using a 2-liter soda bottle, cut it in half just below the bottom of where the label is. It's ideal to leave a hinge, but it's not essential. Other containers, like soda cups and clamshell packages, will work. There is no need to cut them; just use the lid they have.
Scoop dirt into the bottom of the container and add some water. The dirt should be medium-damp, so stir if necessary. Choose seeds and add a pinch on top, and scatter a little dirt on top. Put the top back on and seal the cut with duct tape all the way around. Label your container, and put it outside until spring. It's OK if this gets buried with snow and if it just sits outside, but try to prop it or wedge it so it doesn't get blown around by the wind.
If you have sprouts in the spring, give them a little water and keep the top on until it's consistently 50F outside, then take off the top and water regularly. If you don't have sprouts, give them until early June...if you still have nothing, it was a dud.
Set up your space so that people can get to the things they need in a logical order and keep the messy components apart from everything else. Generally, do what you can to make the project steps separate and linear. People coming in should see the first step (choosing and/or cutting a jug) and then see all the other steps in order as they move through the room, with a display near the exit.
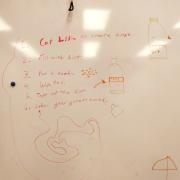
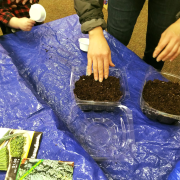
For me, this is a line of tables with scissors, jugs, duct tape, seeds and directions written on the whiteboard. I also set up a central table with a tarp under it, with a big pile of dirt and a jug of water in a plastic bin to catch spills. Little kids have trouble reaching the top of my conference tables, so I have a few step stools available. There are also chairs for people who would like to sit while they work, especially at the label/decoration station.
If you anticipate large crowds of unaccompanied young children, like a school group or afterschool crowd, adding an extra adult per step of the project is ideal. I have mostly run this by myself; families generally help each other, and I can help anyone else, but my crowds for this have been 20 or fewer people, which is pretty manageable. The steps do need to go in order for success, so it's ideal to give participants the guidance they need to do that. You know your audience best!
There will be participants who are not interested in the project but who can't leave yet and who finish the project early. A related book display, a coloring station, a streaming video of time-lapse flowers... there are a lot of good options for extension activities. And of course, you'll want calendars and flyers for the next event ready to go (always be closing!).
Program Execution
I've had between two and 25 people attend this event over the past few years, with an average of nine. My numbers are very manageable. I've generally received positive feedback from attendees. When we have mostly adults and families, we always have fun conversations about gardening, and when I mostly have kids, we have fun working together to accomplish the project. One family said their jugs grew very well, even planting them in the yard and eventually harvesting some kale!
Advice
No matter how I advertise this, only maybe 1 in 10 participants will bring their own container. So, plan ahead to get the jugs you need. I save them up throughout the year and put out a call to colleagues a month in advance.
Be warned that at least one person will make and abandon their project every year. Get ready to adopt an abandoned wintersown seed jug and find out what they planted, if anything :)
Make a handout with the next steps on it to give to people with completed projects. This is helpful in two ways: it reinforces that the jug goes outside, not inside the house, and gives people something to put on the fridge to remind them that the jug is outside (it's easy to forget!)
This is an awesome way to brighten up late winter and get a jump on spring planting, but it's also a fun after-storytime project. It's a window to a discussion about how plants work and to what kind of challenges people have had with gardening. There are a lot of ways to make this fun and impactful for your community!

